Installation on Teltonika RutOS (Asset Mode)
This guide provides instructions for installing the XplicitTrust agent on a Teltonika router running RutOS.
Asset mode means services (like SSH, HTTPS, remote desktop, etc) can be remotely accessed from an XplicitTrust client, or from another system running in asset mode.
Supported devices:
- RUTX series (ARM Cortex-A7, e.g. RUTX08, RUTX09, RUTX10, RUTX11, RUTX12, RUTX14, RUTX50)
- RUTC series (ARM64 Cortex-A53, e.g. RUTC50)
- RUTM series (MediaTek MIPS 24Kc, e.g. RUTM50, RUTM51, RUTM52)
Installation
- Download the
.ipkpackage for your device fromhttps://dl.xplicittrust.com/:- xtna-agent-rutos_arm_cortex-a7_neon-vfpv4.ipk (RUTX series)
- xtna-agent-rutos_aarch64_cortex-a53.ipk (RUTC series)
- xtna-agent-rutos_mipsel_24kc.ipk (RUTM series)
- In the RutOS WebUI, navigate to System → Package Manager → Packages.
- Switch to the Upload tab, upload the downloaded
.ipkfile and install it.
To install the XplicitTrust agent via the command line, run:
ARCH="$(case "$(uname -m)" in aarch64|arm64) echo aarch64_cortex-a53 ;; armv7l|armv7|armhf) echo arm_cortex-a7_neon-vfpv4 ;; mips|mipsel) echo mipsel_24kc ;; *) echo "unsupported" >&2; exit 1 ;; esac)"
wget https://dl.xplicittrust.com/xtna-agent-rutos_${ARCH}.ipk
opkg install ./xtna-agent-rutos_${ARCH}.ipk
Configuration
See the xtna-util reference for a complete list of available flags.
Navigate to Services → VPN → XplicitTrust → Registration in the RutOS WebUI to register the device.
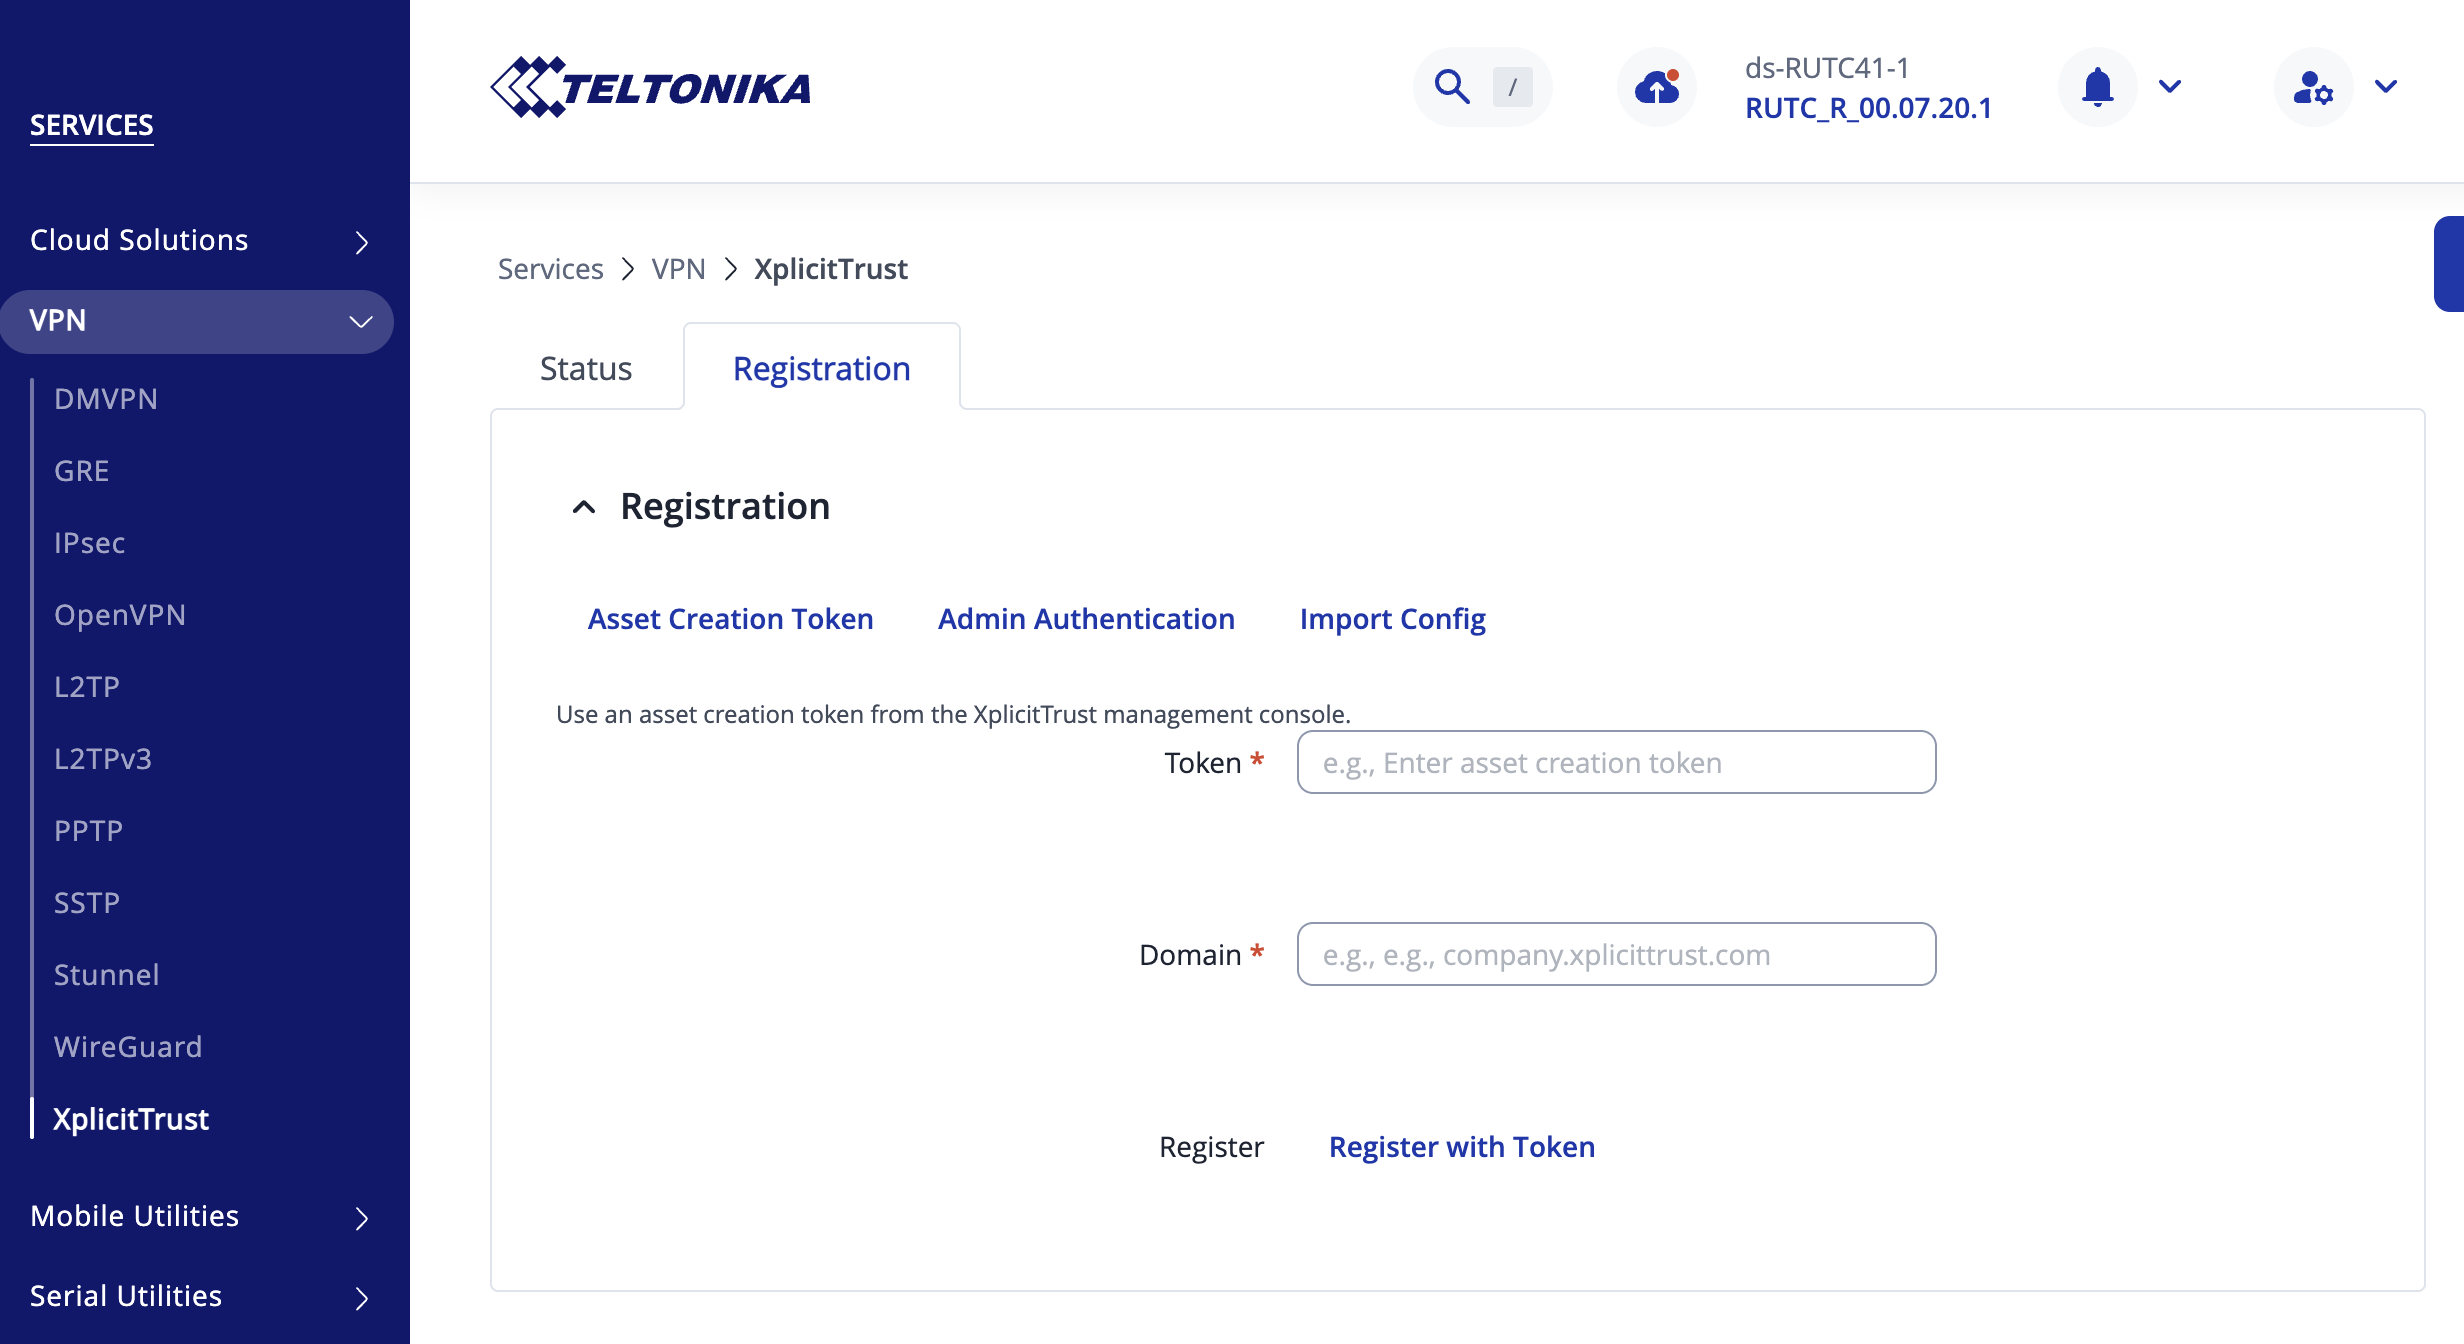
- To register the device as an asset:
xtna-util -user <XplicitTrust admin email address> - Open the URL that xtna-util returns in a browser to authenticate.
- Go to the Admin Console settings page
- Create a new "Asset Creation Token", configure it, download and store it in a secure place.
- Use the token to register assets:
xtna-util -domain <tenant domain> -token <token>
- Go to the Admin Console assets page
- Click "Create new" button, fill out the form, and click "Apply".
- Click the "Download Config" icon at the top of the form box.
- Copy the configuration to the device and run:
xtna-util -import xtna-*.xtconfig
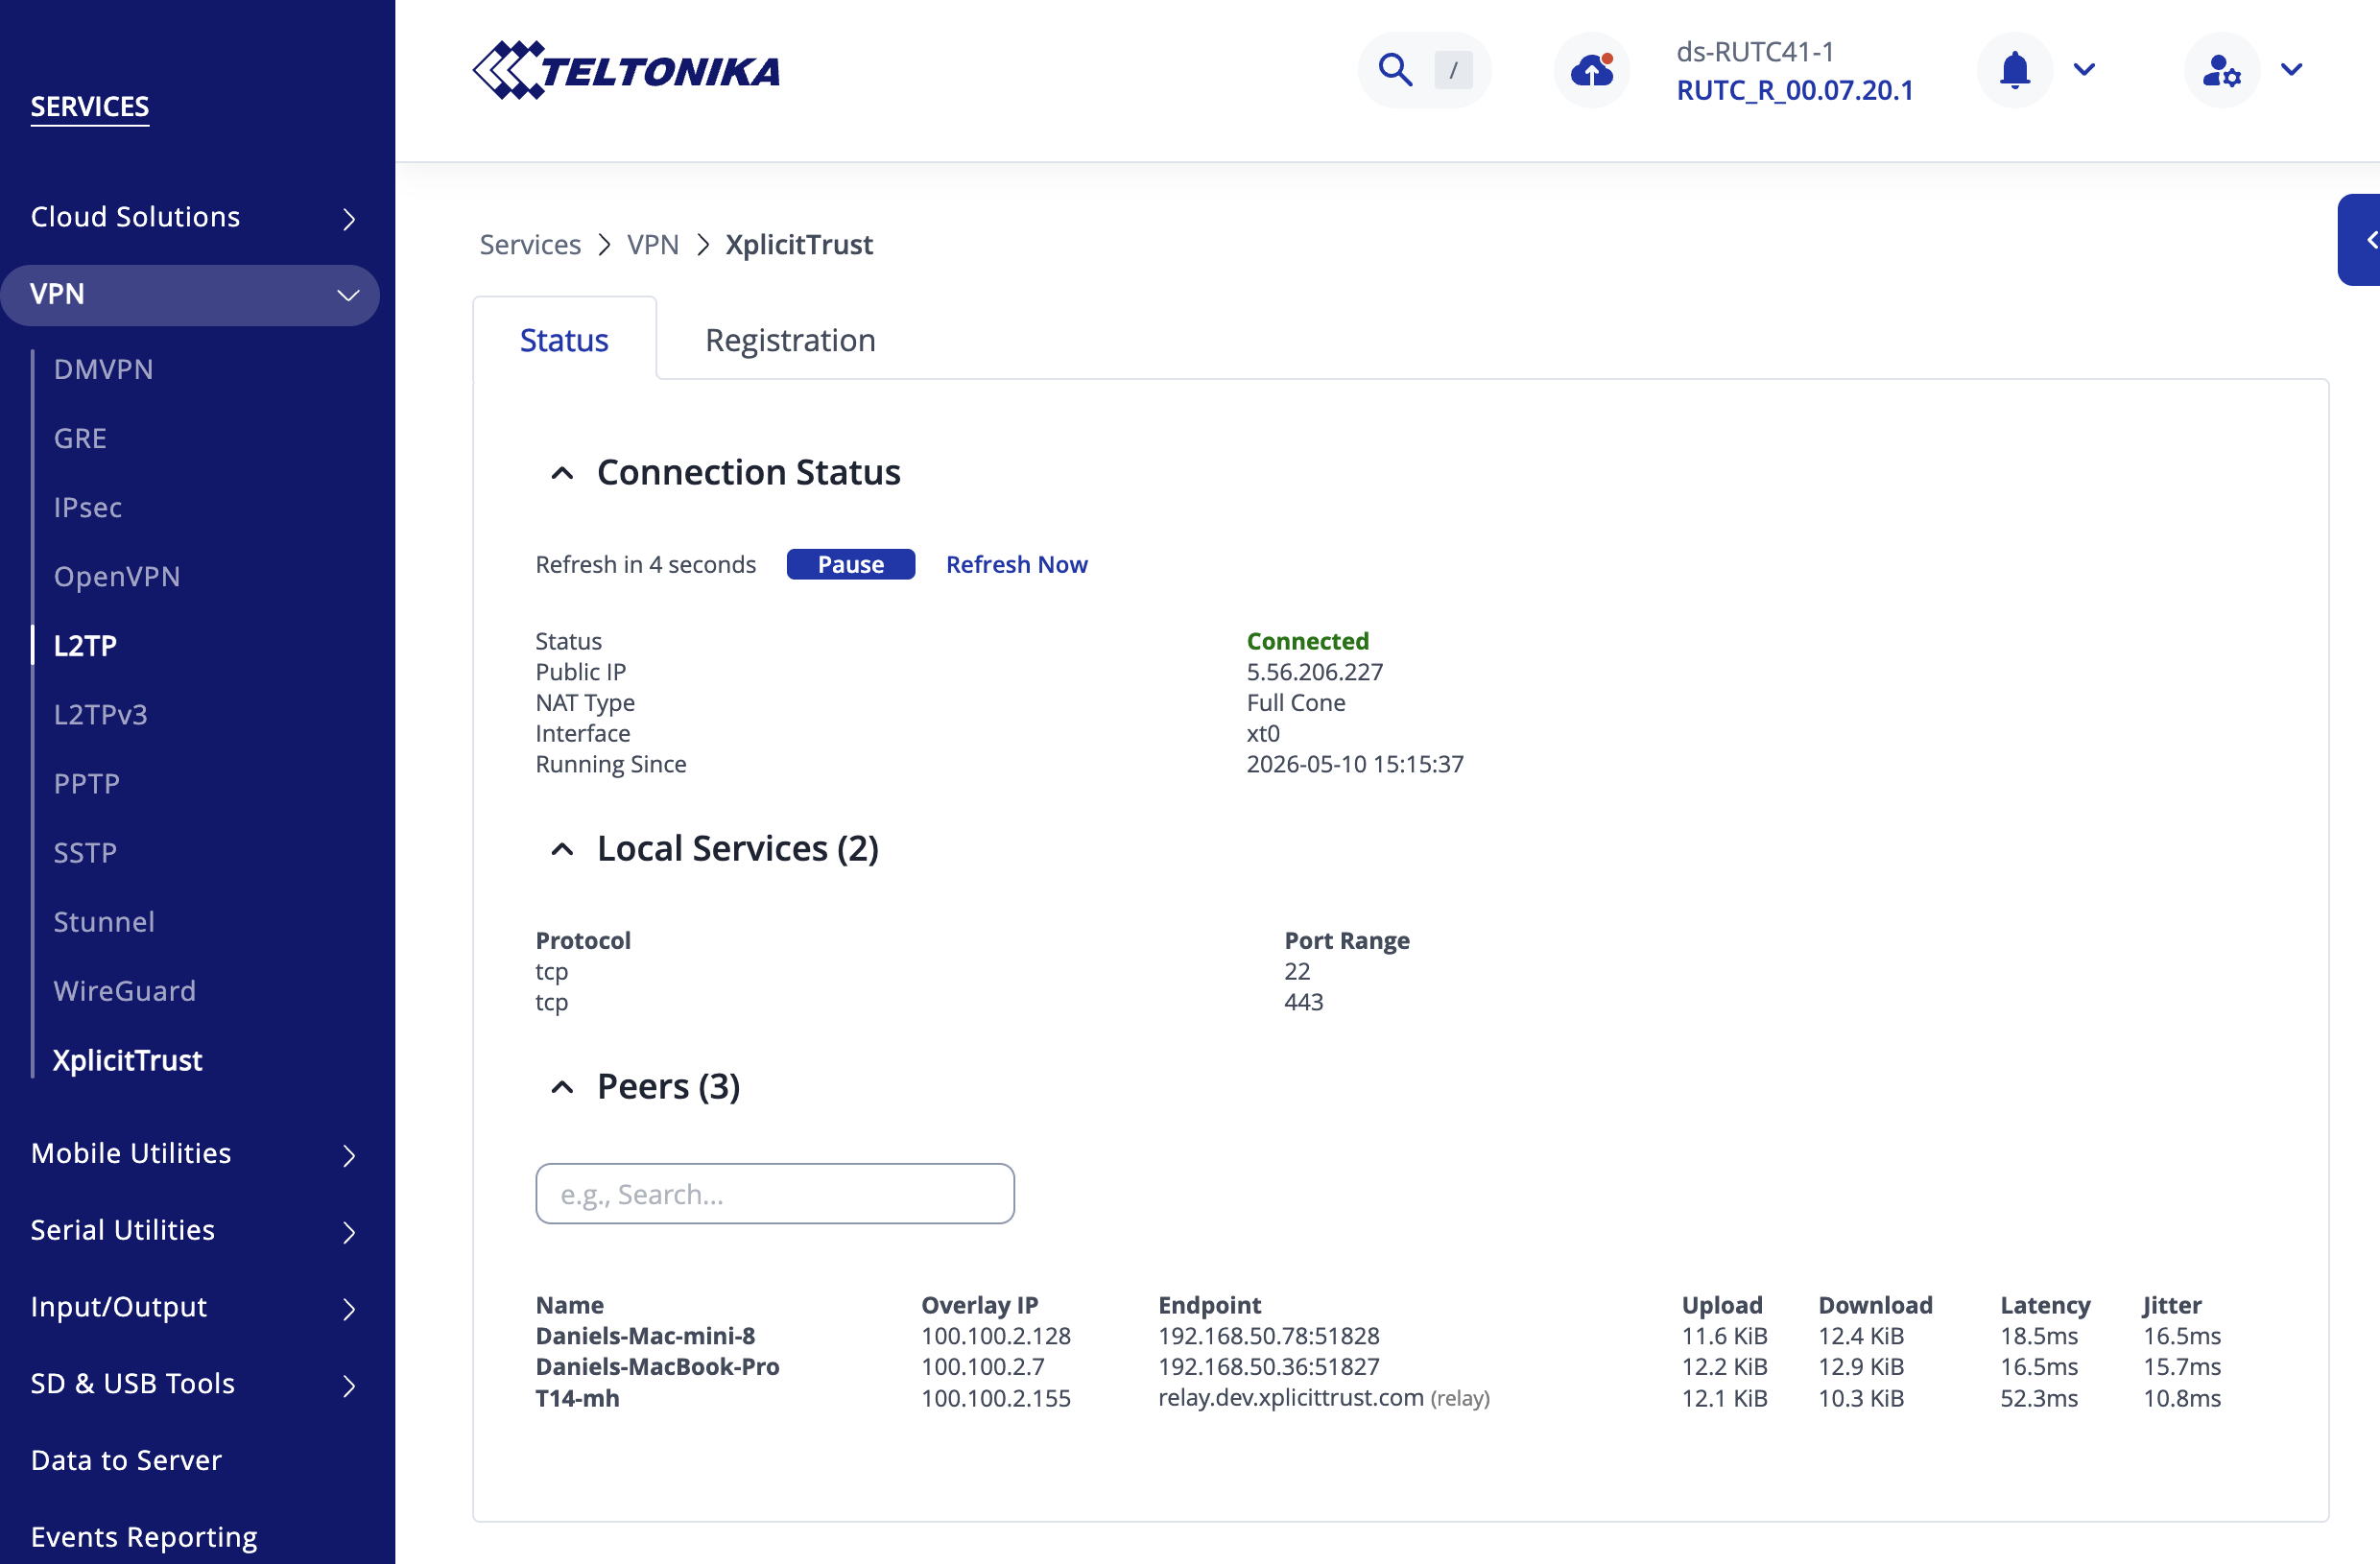
Status Monitoring
Navigate to Services → VPN → XplicitTrust → Status in the RutOS WebUI to see the connection status of the agent.
Troubleshooting
If the registration fails or the agent is not able to get Online, check that outgoing HTTPS connections (TCP port 443) are allowed. For the best experience, allow outgoing connections on UDP port range 51820 - 60000.
Consult the FAQ to learn more about troubleshooting firewalls.