Quick Start Guide
This guide walks you through:
- Signing up for an XplicitTrust account
- Installing the XplicitTrust agent on at least one asset and one client
- Defining a Policy to grant access to assets
- Extending access to whole networks via Subnets and routing internet traffic through an Exit Node
Choosing an Identity Provider
Before signing up, decide which Identity Provider (IdP) you want to use. Most organizations already use Microsoft Entra ID, while some prefer European alternatives like AuthN by IDEE or Bare.ID. For a comparison of the supported options, see Identity Providers.
This guide uses Microsoft Entra ID as an example.
Creating an XplicitTrust Account
-
You need a Microsoft Entra ID user account with one of the following admin roles:
- Global Administrator
- Application Administrator
- Cloud Application Administrator
-
Sign up for an XplicitTrust Admin Console account (if you don't already have one):
-
Click the Signup button.
-
Follow the Microsoft login flow.
-
On the Microsoft "Permissions Requested" screen, check "Consent on behalf of your organization" (this is important) and click Accept:
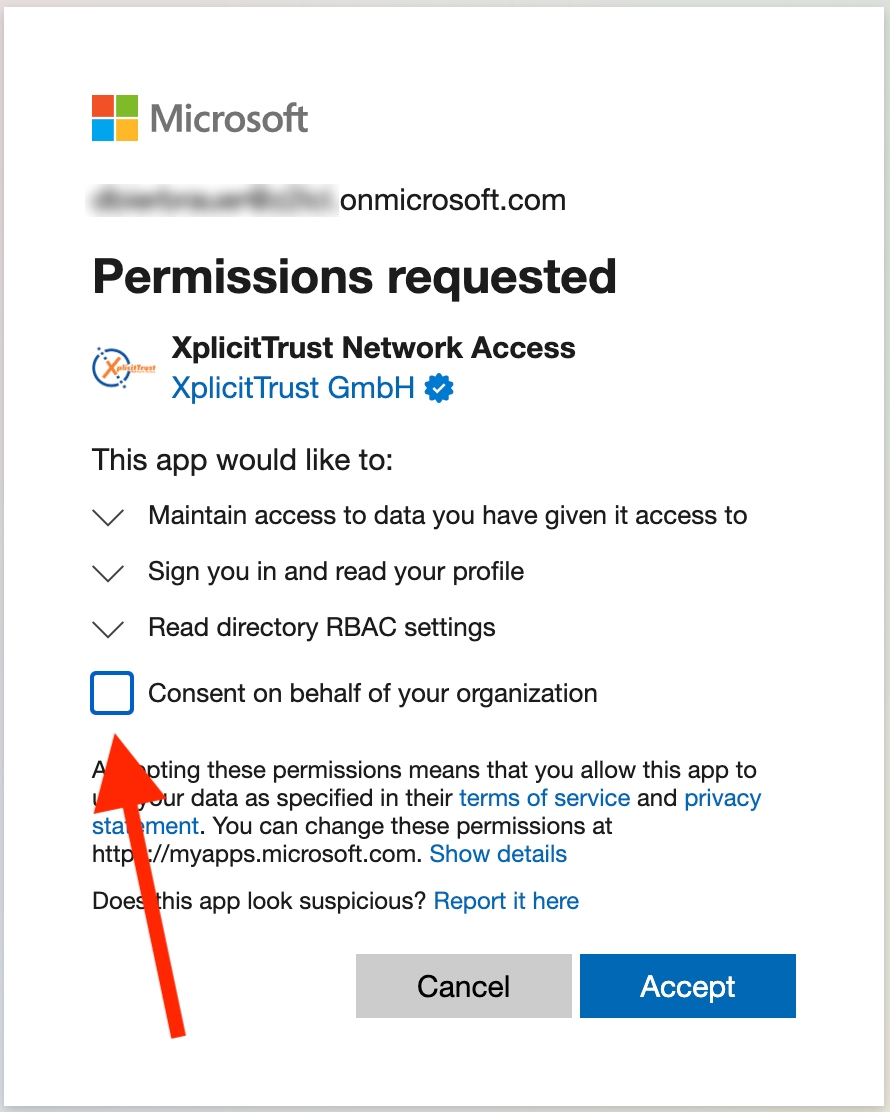
-
You will be asked to sign in a second time and will see a second "Permissions Requested" screen. Click Accept again:
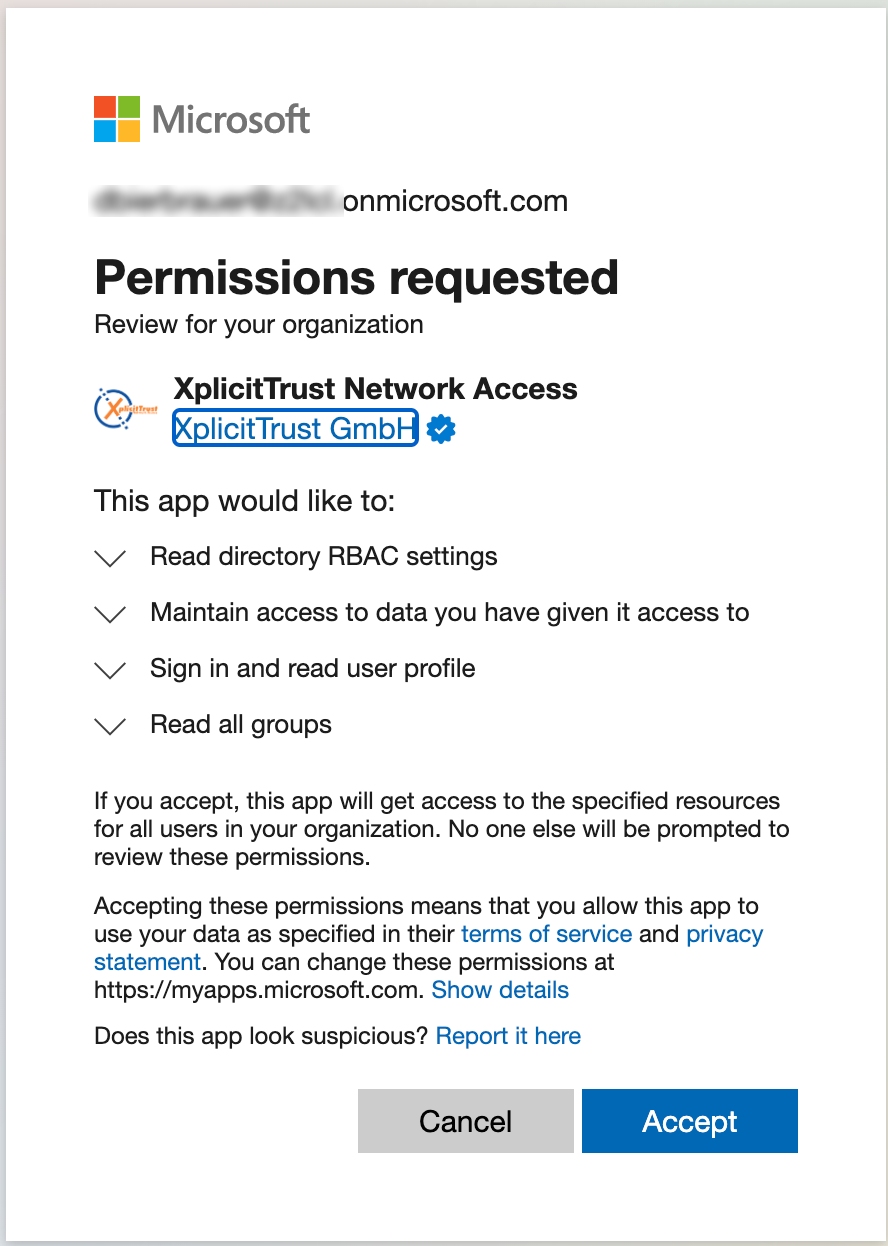
-
You are now signed in to the XplicitTrust Admin Console:
https://console.xplicittrust.com/
Assets vs. Clients
With XplicitTrust you can connect any number of devices to each other.
Before connecting a device, decide whether it should run as a client or as an asset (or, for advanced setups, as a virtual asset):
-
Clients
Devices that consume services on other devices. Typically end-user computers and laptops are set up as clients. -
Assets
Devices that expose services like SSH, HTTPS, RDP, etc. Typically servers are set up as assets. Assets can also be peered to access one another directly. -
Virtual Assets
Used for devices where you don't want to or can't install our agent — for example printers, network cameras, NAS appliances, or unpatchable legacy systems. They are reached through another asset on the same network (the gateway asset, typically a Linux or Windows machine).
Get Your First Devices Connected
To see the system in action, we recommend setting up one device as a client and one device as an asset.
-
Set up one device as a client:
-
Set up one device as an asset:
Linux, Windows, Mac, Raspberry Pi, OpenWrt, Teltonika RutOS, Synology, or as a container.
-
Access the asset from the client:
-
Click the XplicitTrust icon in the system tray (Windows) or status bar (macOS / Linux) to open the agent. You will see the available assets together with their tunnel IPs:
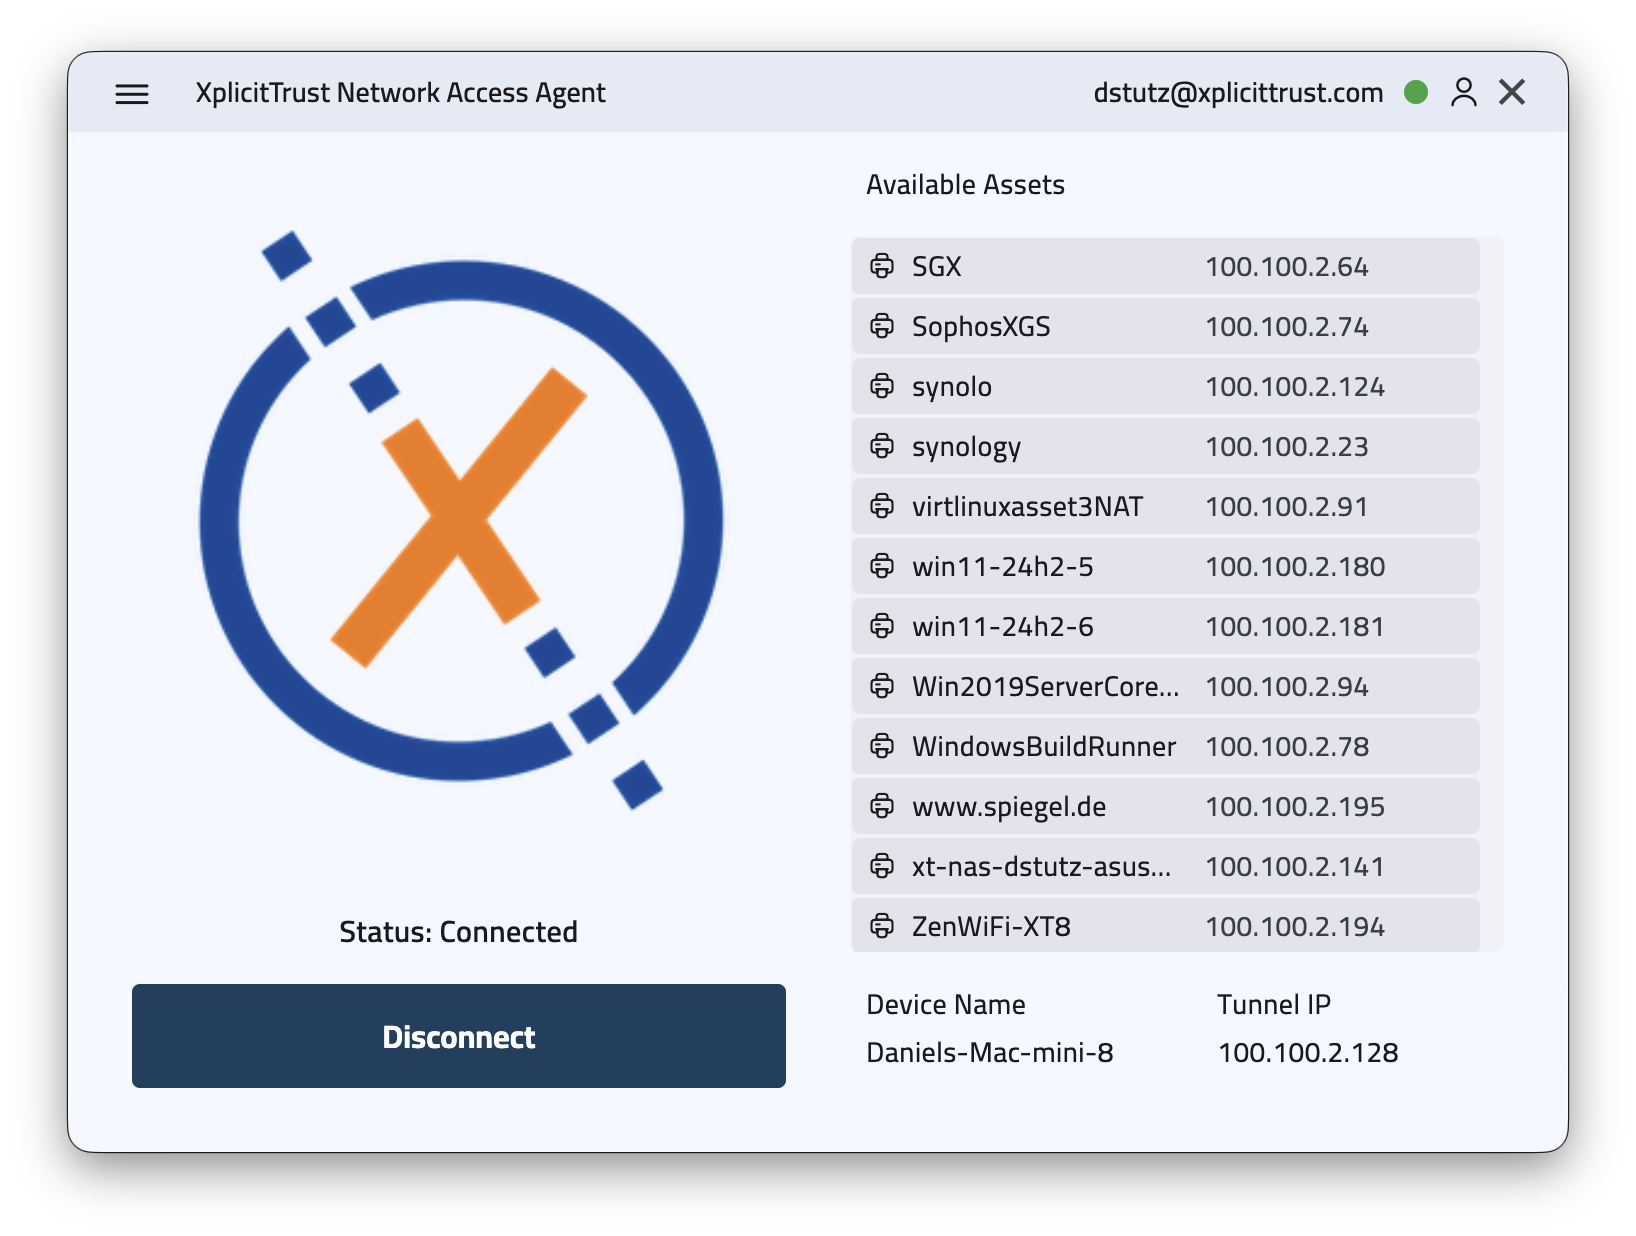
-
You can reach the asset by its hostname (shown under "Available Assets") or by its tunnel IP (in the
100.100.0.0/16range).
-
Policies in XplicitTrust
-
By default, a "Deny All" policy applies to every asset.
-
As a result, a freshly created asset is not reachable by any client or other asset.
-
To grant access, create or update a Policy.
Reaching Whole Networks via Subnets
Sometimes you want clients to reach more than just the asset itself — for example a printer, a NAS, or a server that you cannot install the agent on. Instead of declaring each one as a virtual asset, you can expose a whole IP range as a Subnet.
A subnet uses a Linux or Windows asset as the gateway asset that routes traffic into the local network:
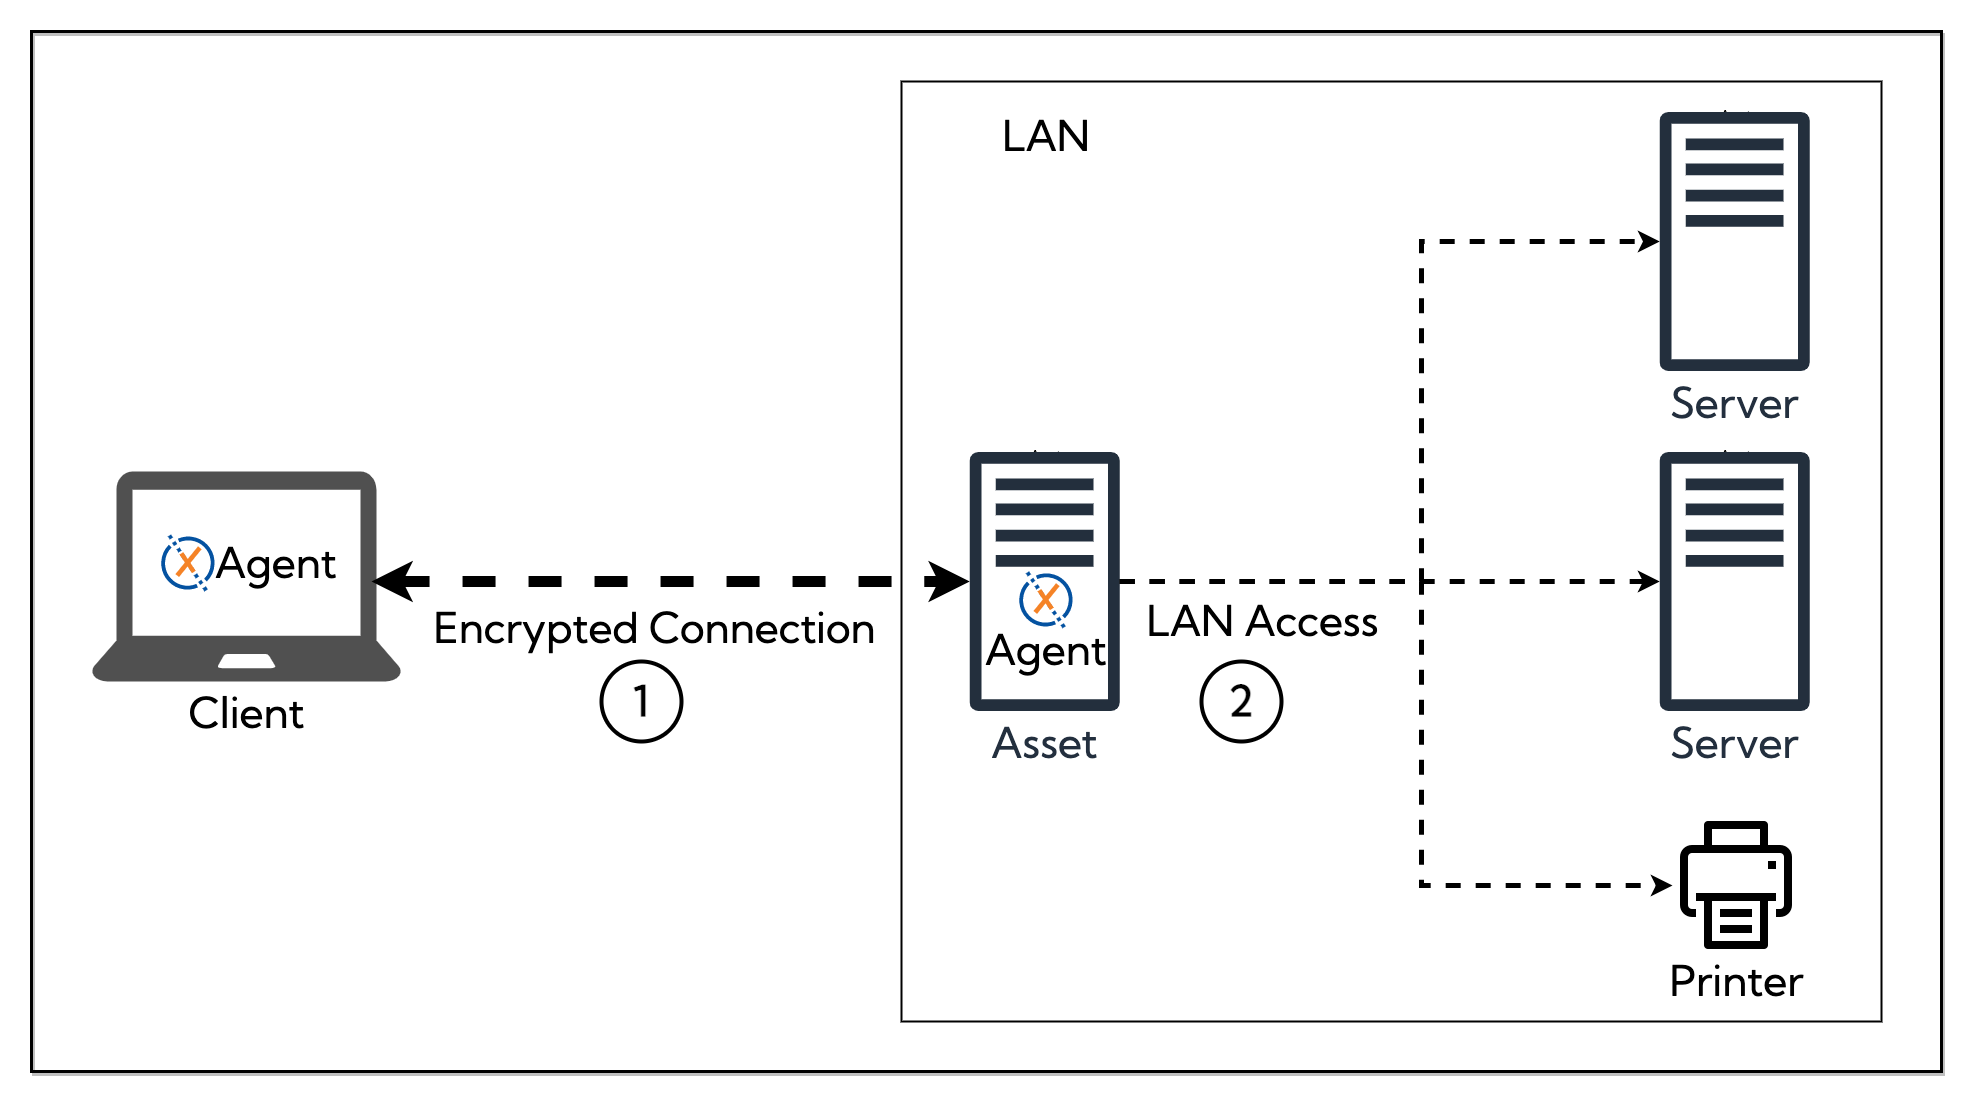
In short:
- Install the agent on a device inside the target network and register it as an asset.
- In the Admin Console, create a Subnet, choose that asset as the gateway, and enter the network range in CIDR notation (e.g.
192.168.1.0/24). - Grant access via a Policy.
If a connecting client is already in that network range, traffic stays on its local interface instead of going through the tunnel.
For subnets where the gateway asset should also act as the DHCP server for the segment, see Managed Subnets.
For full configuration details, see the Subnets and Gateways documentation.
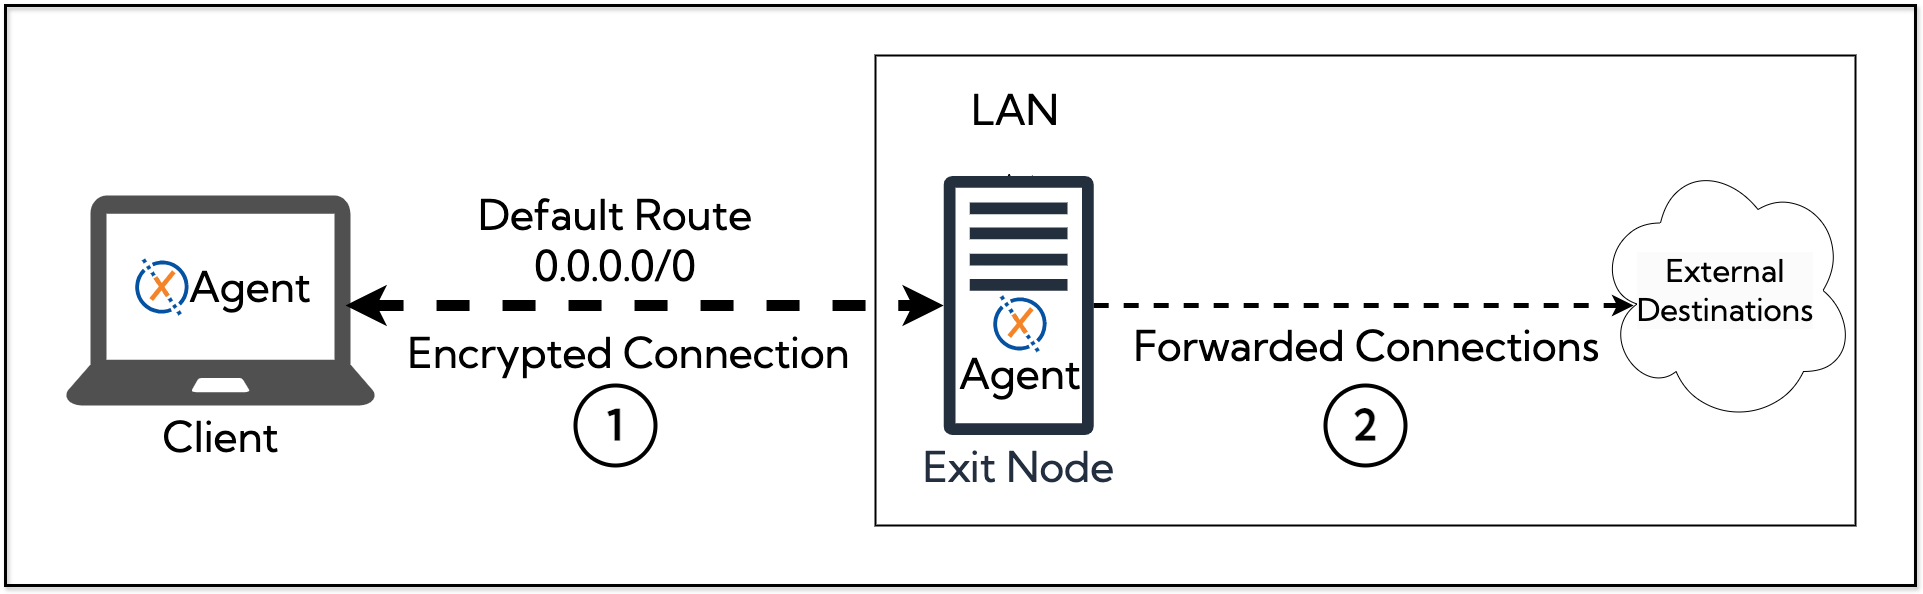
Routing Internet Traffic via an Exit Node
An Exit Node is a special gateway asset that becomes the default route for any traffic that isn't destined for another asset, virtual asset, subnet, or the client's local network. Use it to route a client's internet traffic through a specific location — for example, to appear from an office IP, or to reach the internet from a country where a service is only available locally.
To set one up:
- Install the agent on a Linux device with internet access and register it as an asset.
- In the Admin Console, configure that asset as an Exit Node.
- Grant access via a Policy.
For details, see Gateways.