Signing up with Keycloak
Prerequisites
- A Keycloak instance.
- Administrator access to the relevant Realm.
Configure Keycloak
Step 1: Create and Configure Client
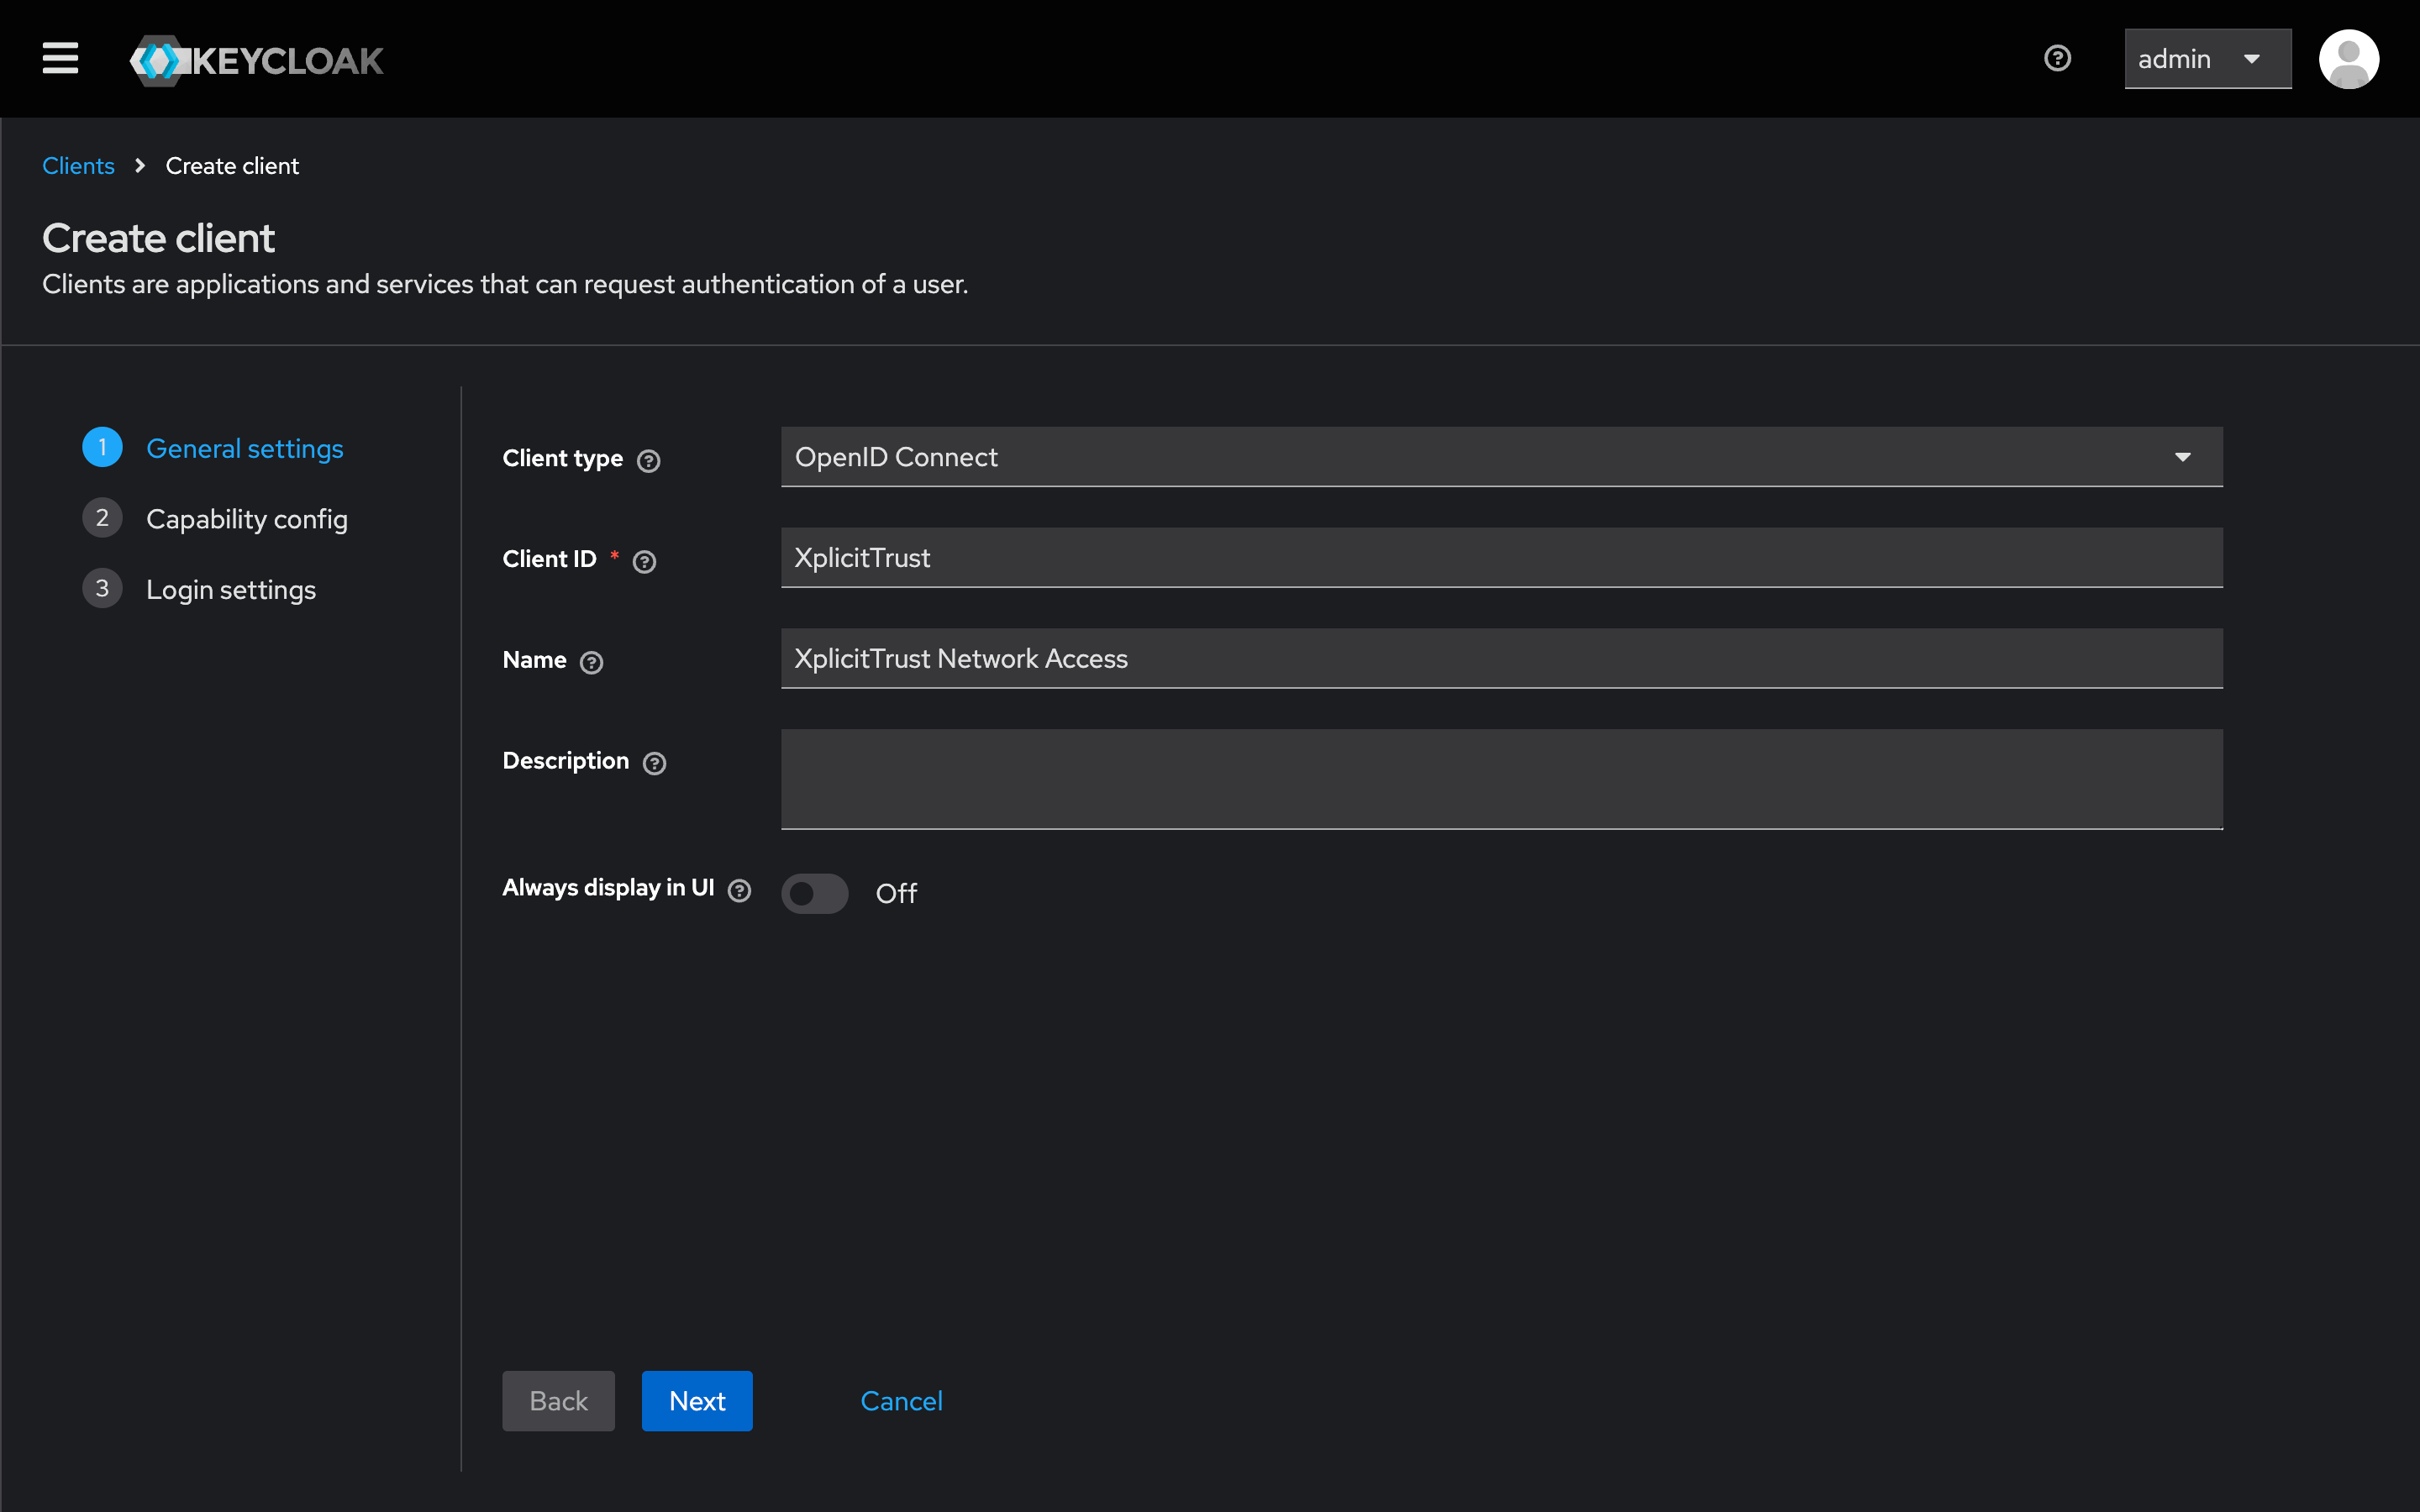
Create a new Client under the Realm you want to use. Follow the configuration tabs below:
- Set Client type to
OpenID Connect. - Choose a
ClientID(e.g.,xplicittrust) and aName. - Important: Note down the Client ID for later.
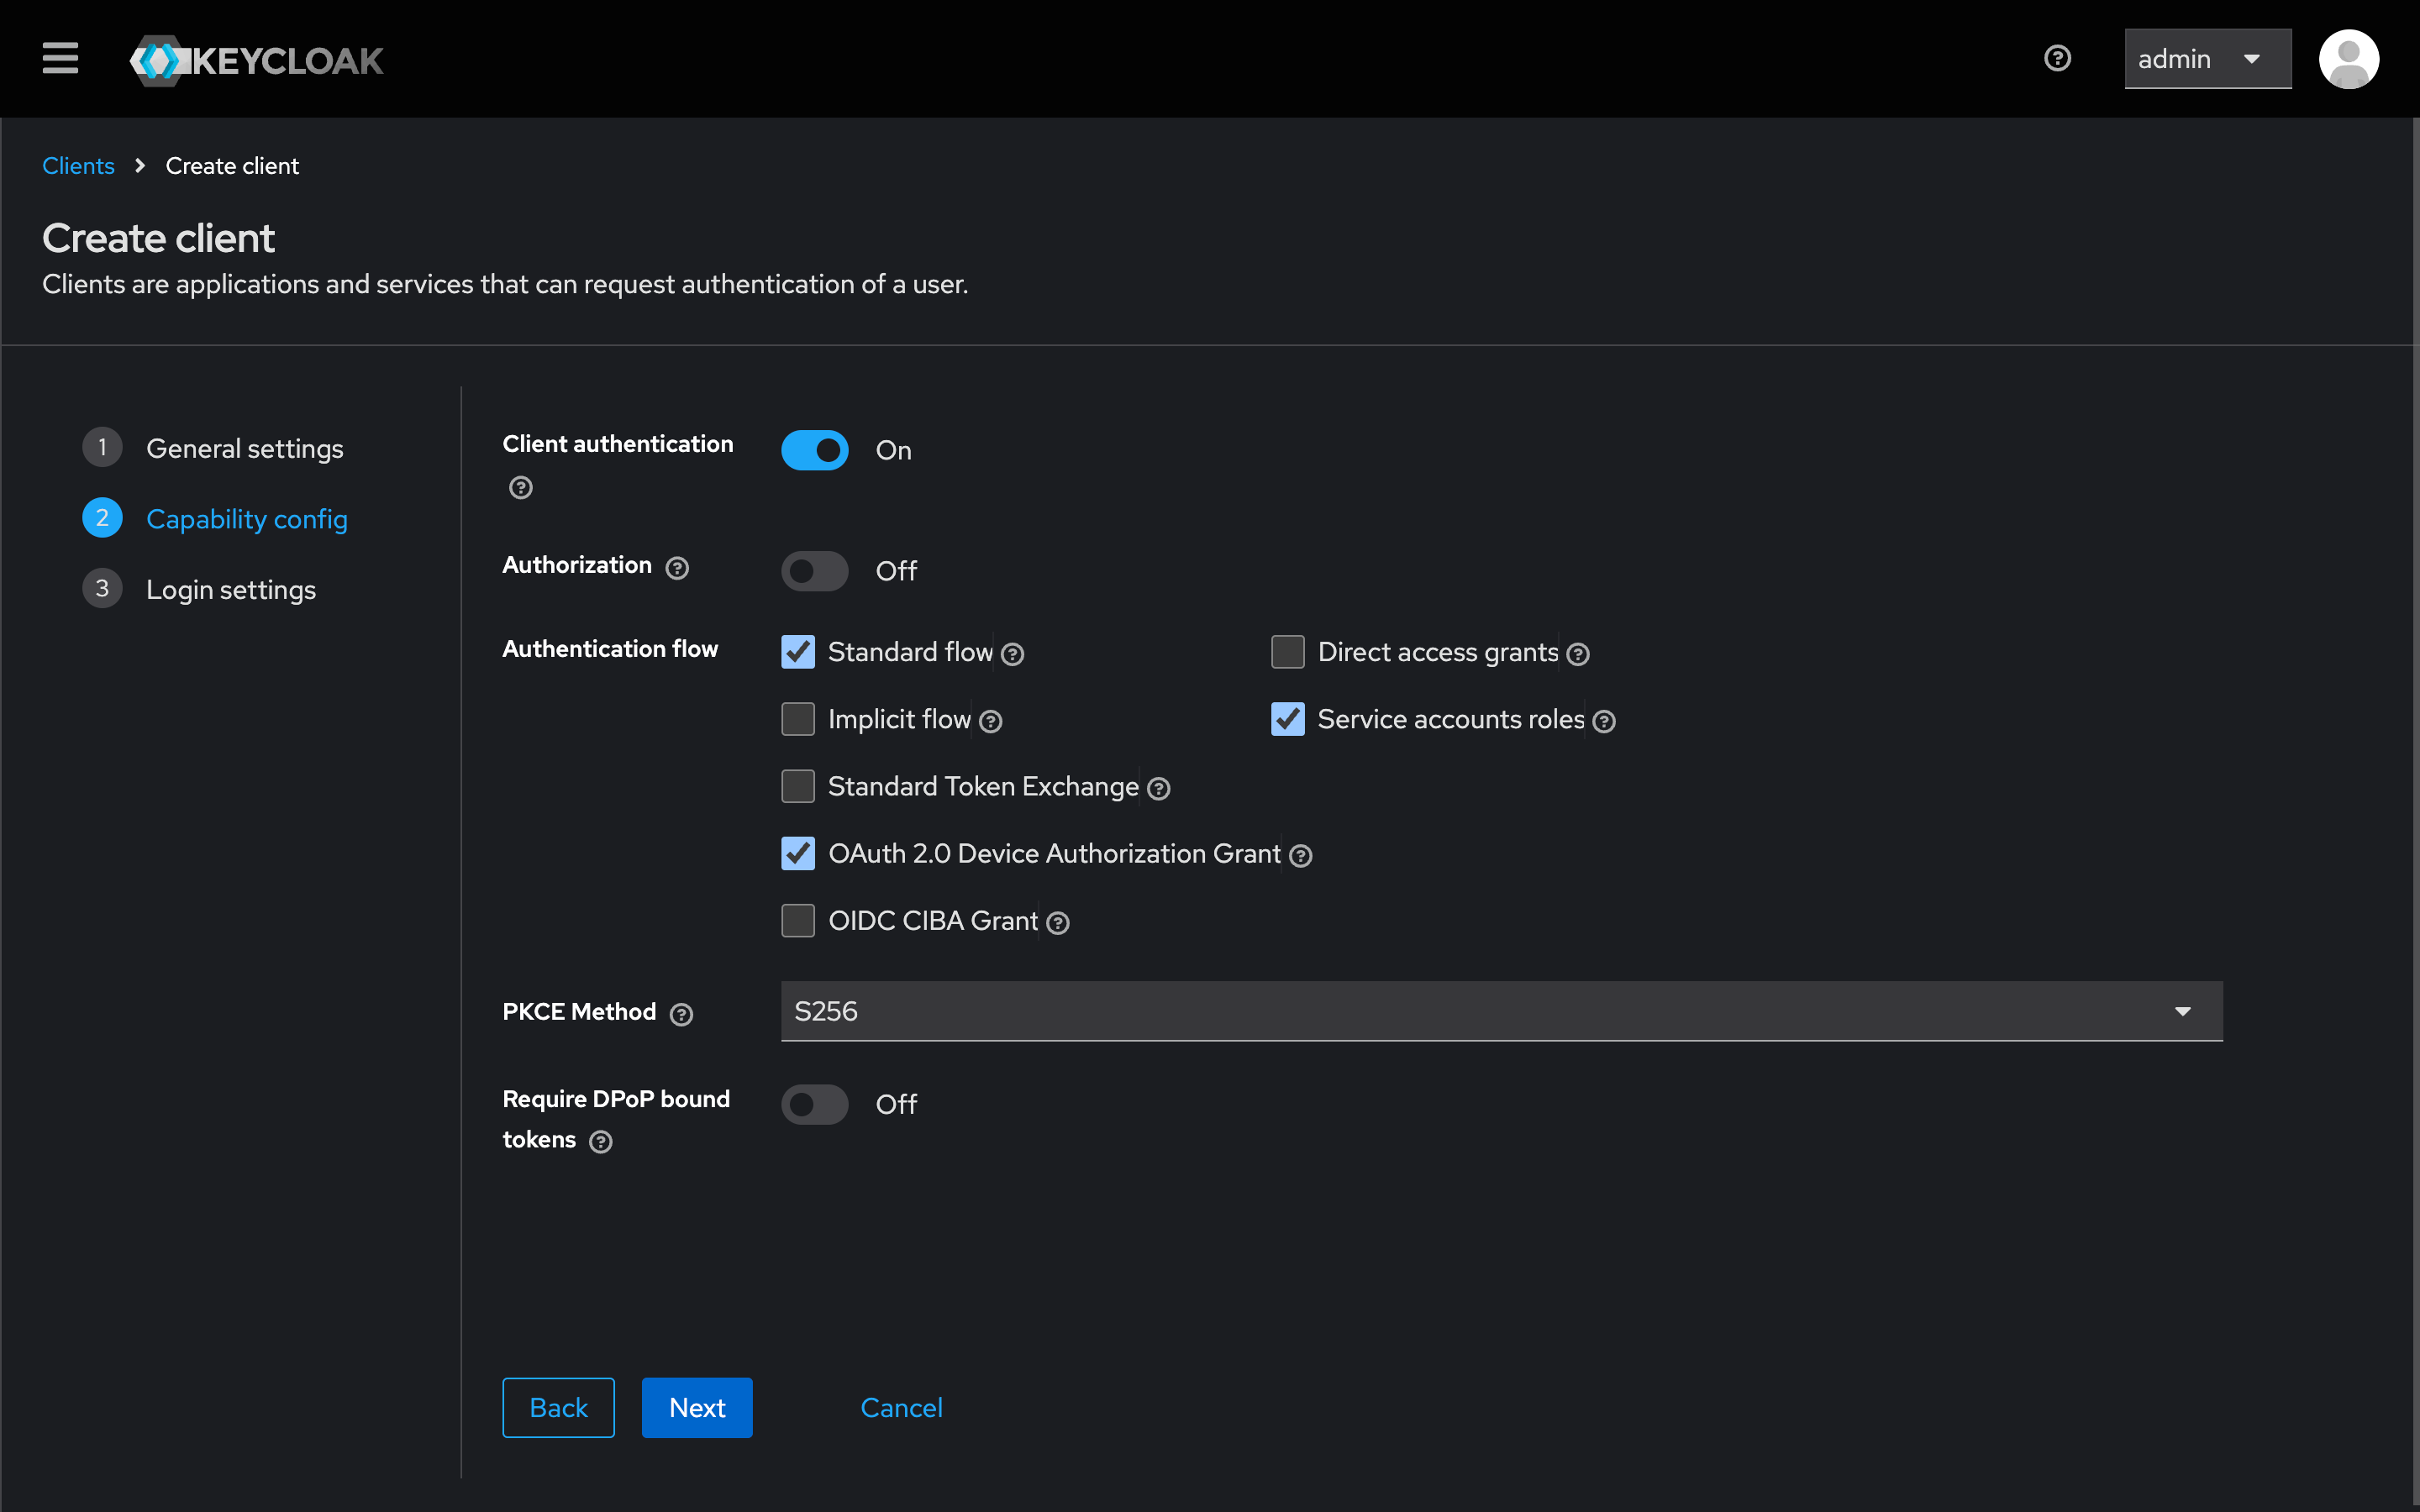
- Enable
Client authentication. - Under Authentication flow, select:
Standard flowService account rolesOAuth 2.0 Device Authorization Grant
- As PKCE Method, select
S256.
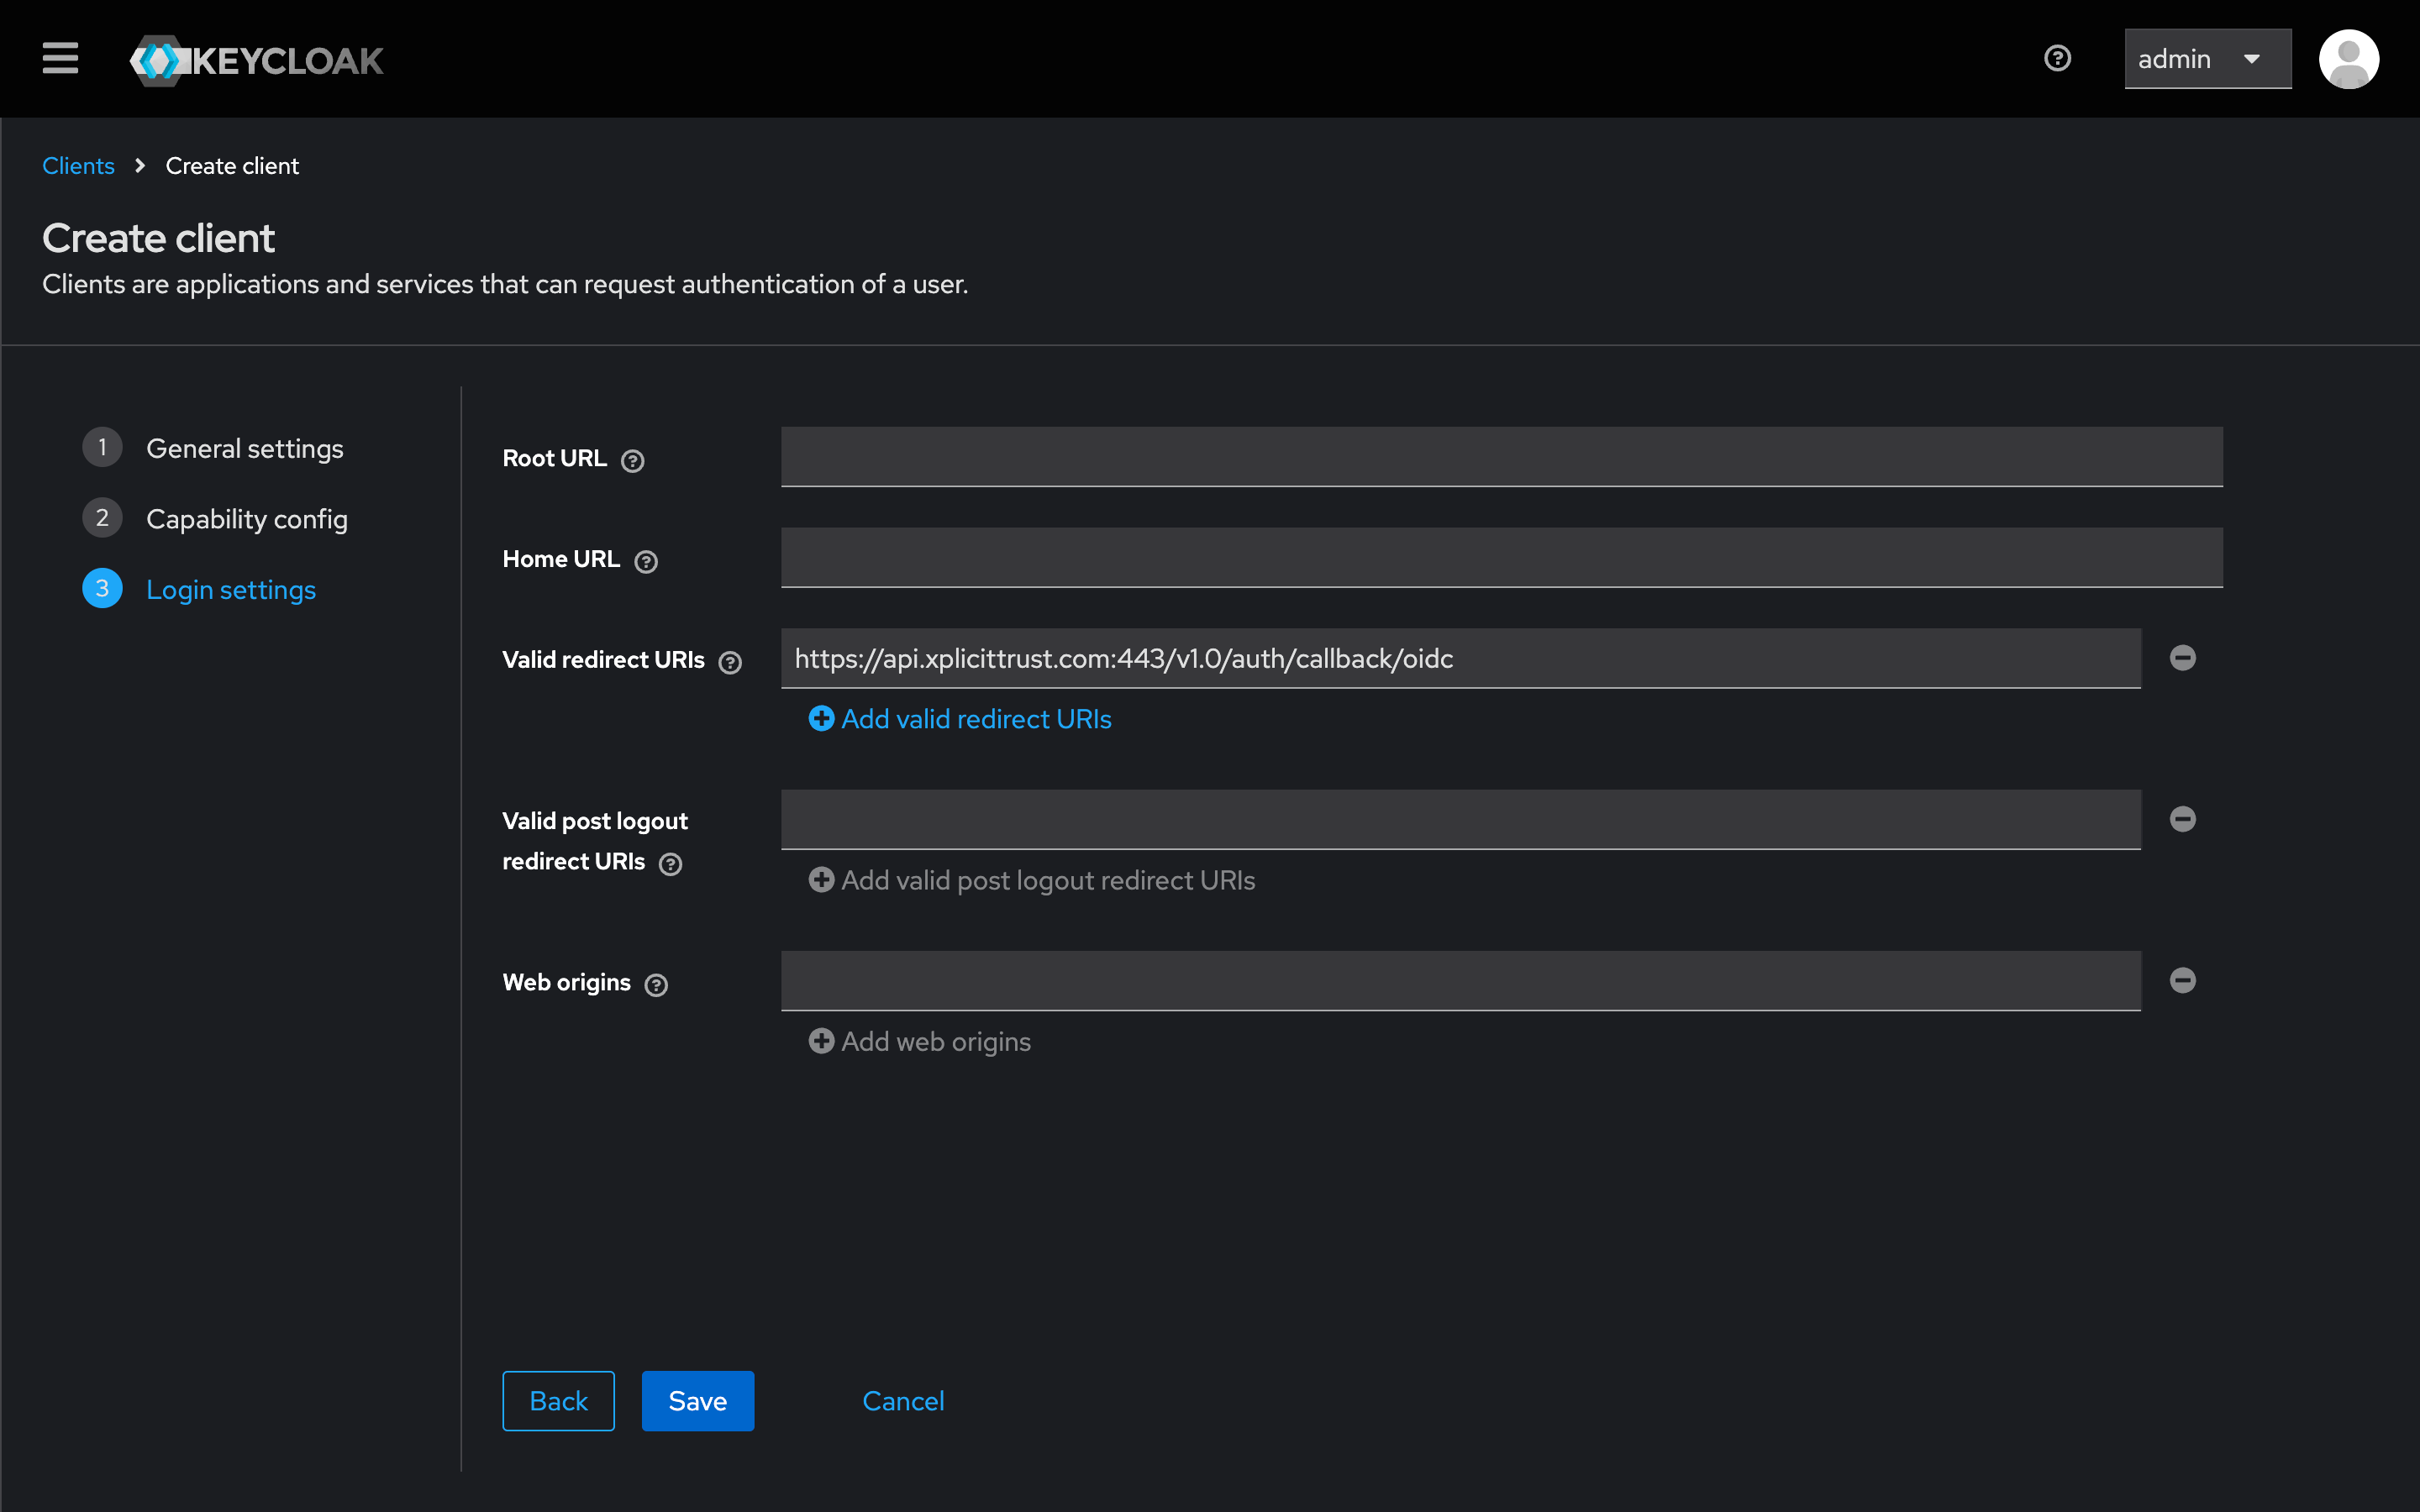
- Locate the Valid Redirect URIs field.
- Copy and paste the following URL:
https://api.xplicittrust.com:443/v1.0/auth/callback/oidc
Step 2: Credentials and Roles
- Navigate to the Credentials tab and copy the
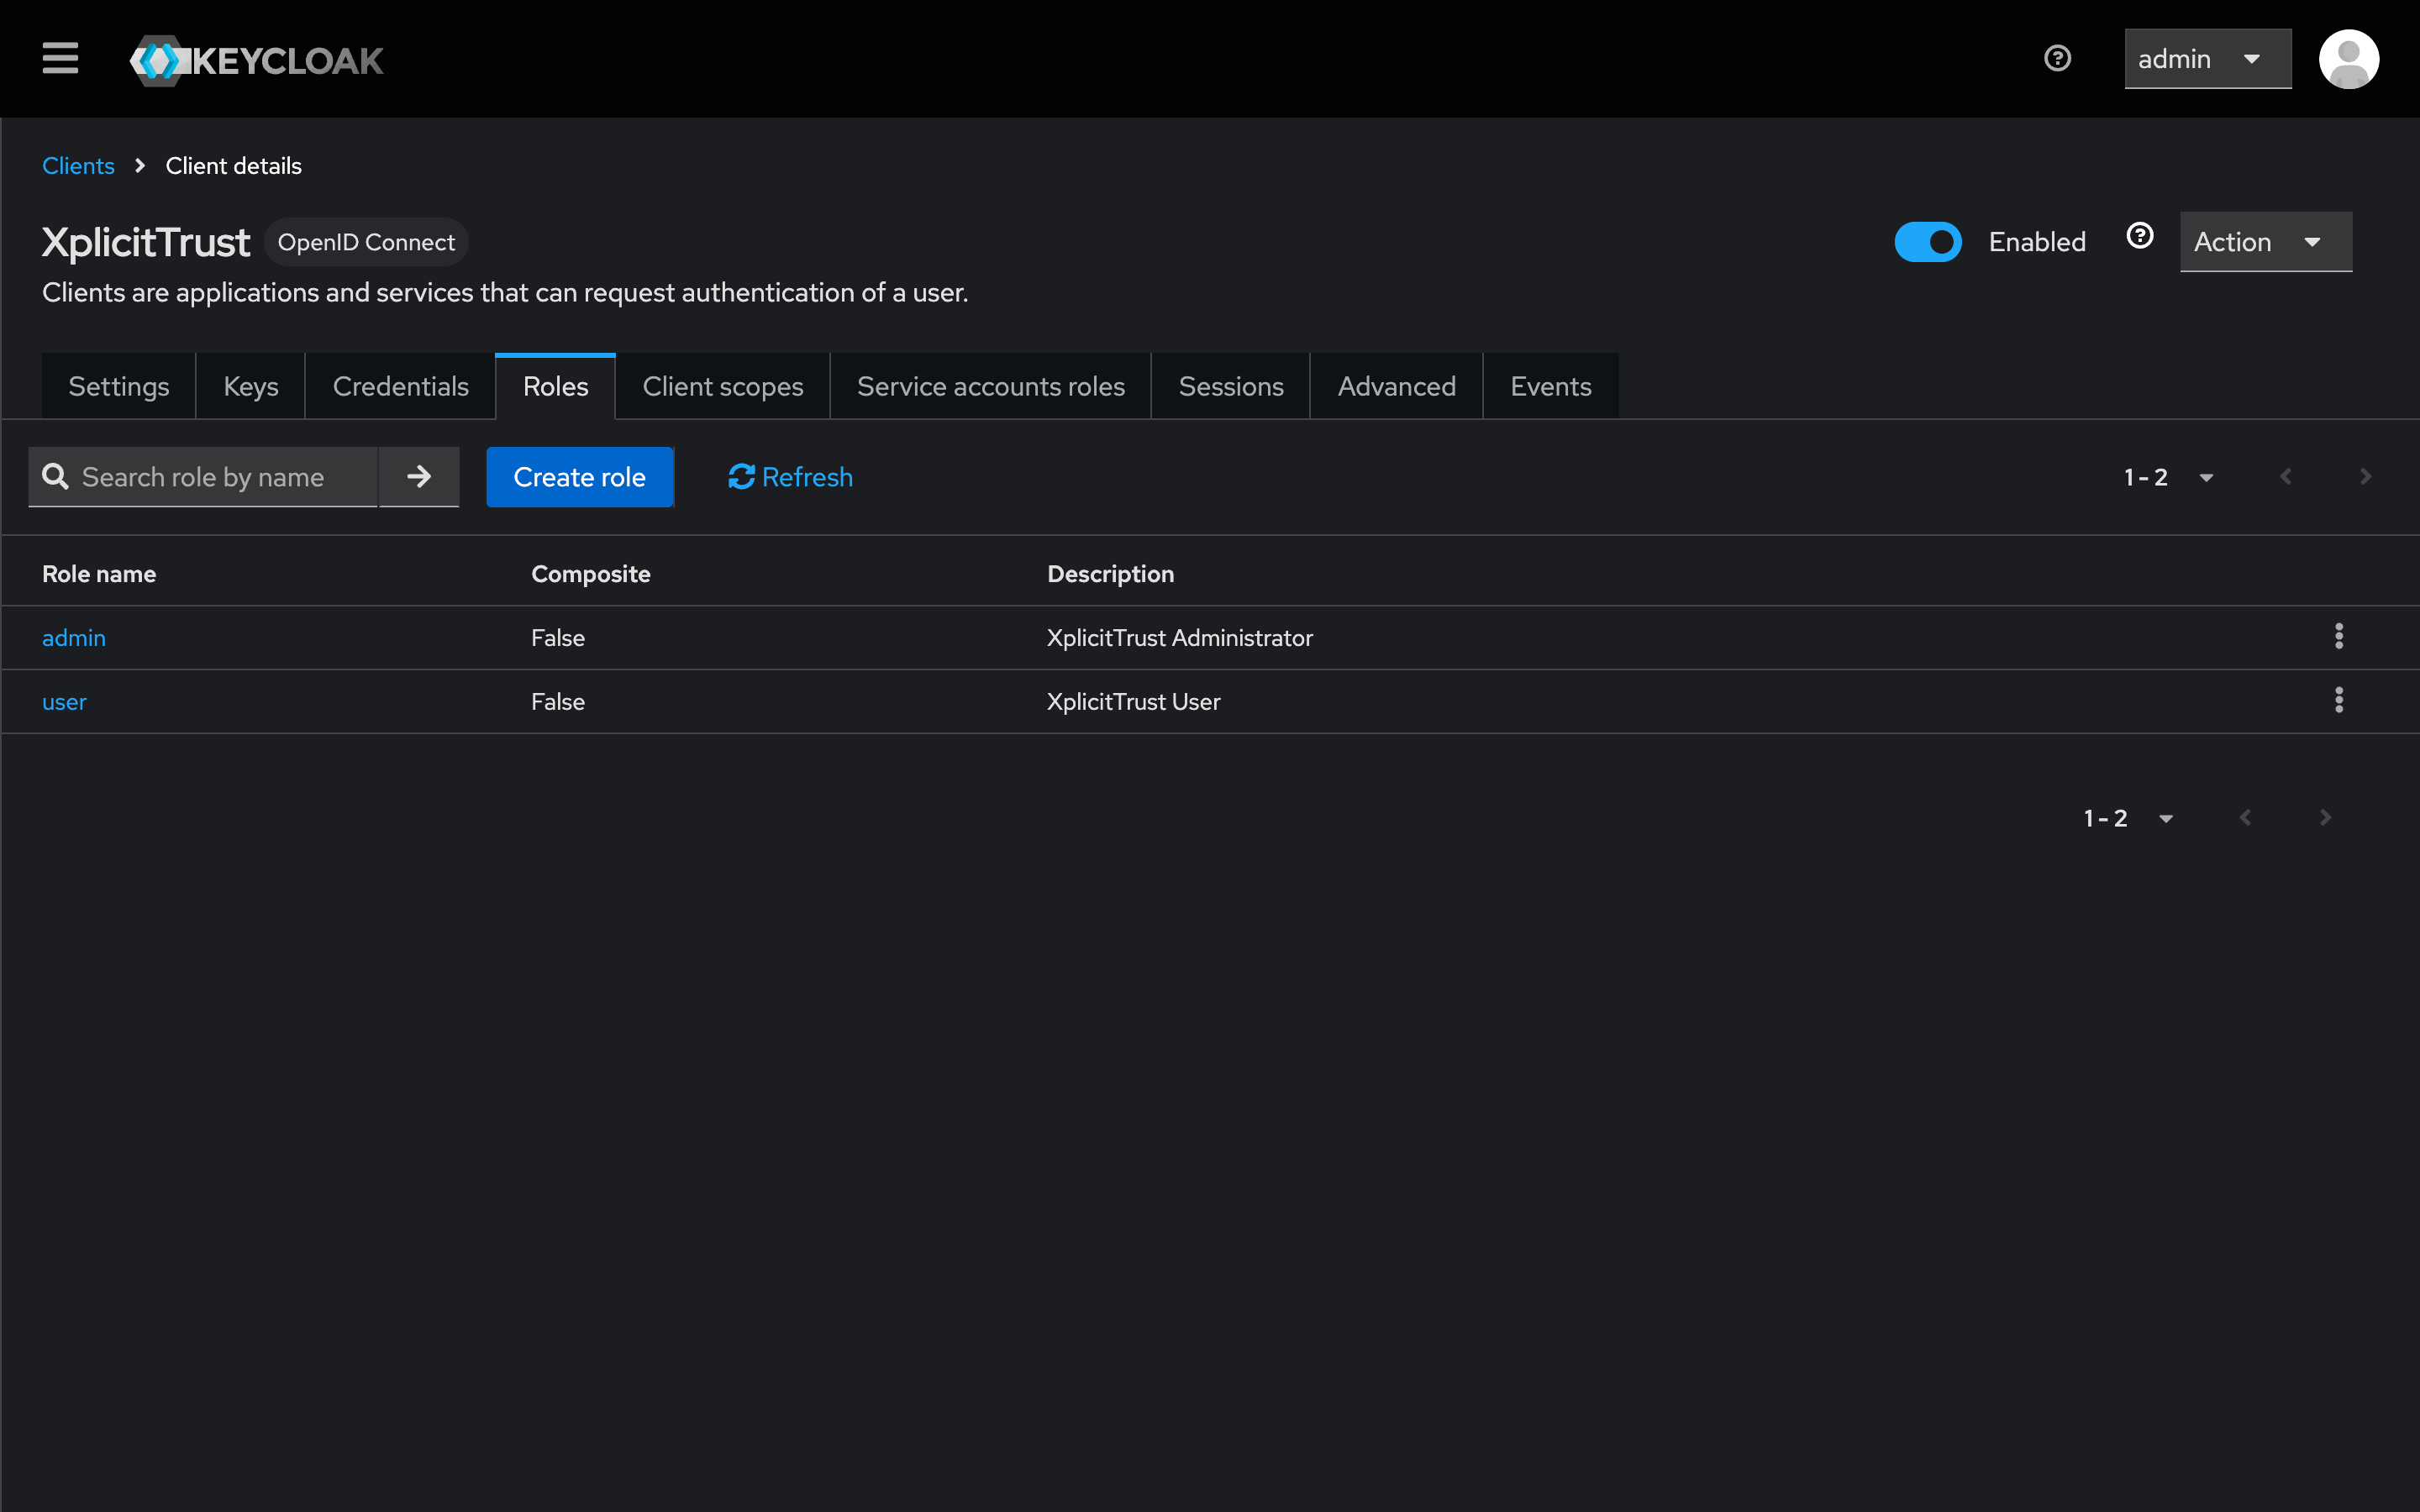
Client Secret. Note the Client Secret. You will need it for the final signup step. - Navigate to the Roles tab and create two new roles:
admin(Grants administrative access to the XplicitTrust Admin Portal)user(Allows users to sign in at the XplicitTrust Agent)
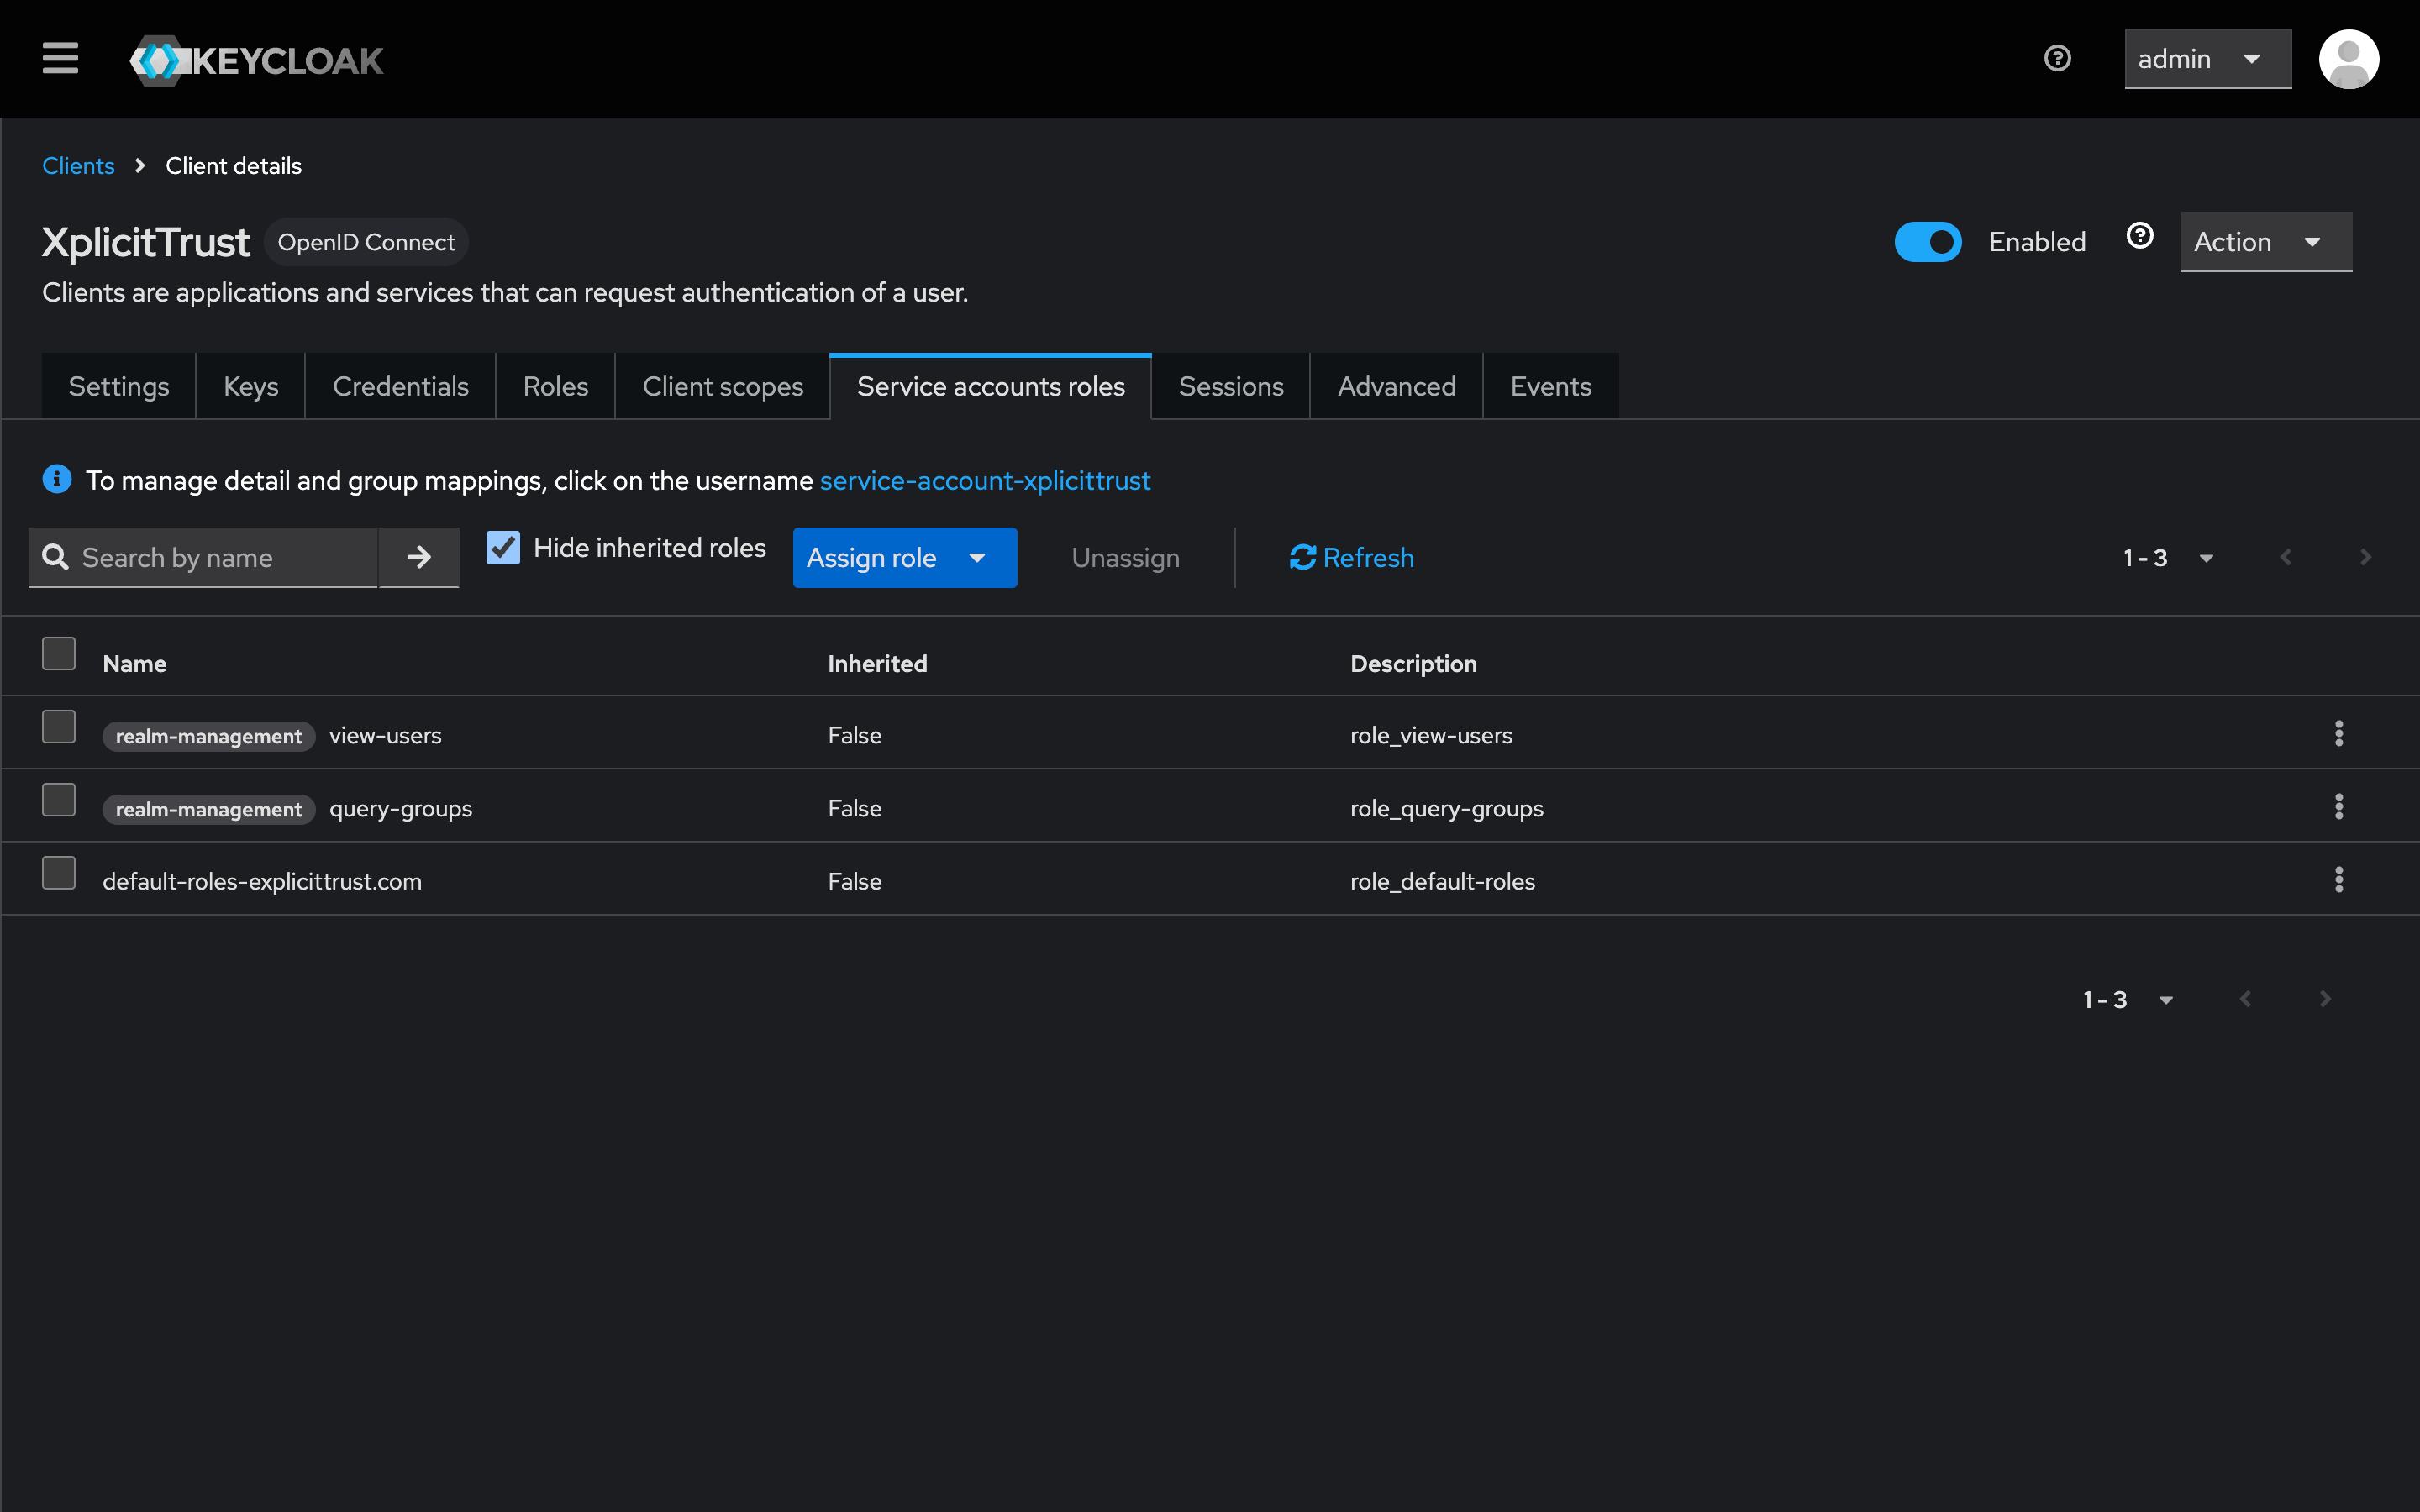
- Navigate to Service Account Roles:
- Click Assign Role.
- Filter by client
realm-management. - Assign the following roles:
query-groups,view-users.
Step 3: Configure Scopes and Mappers
Navigate to Client Scopes and click on the XplicitTrust-dedicated scope (usually named <Client-ID>-dedicated).
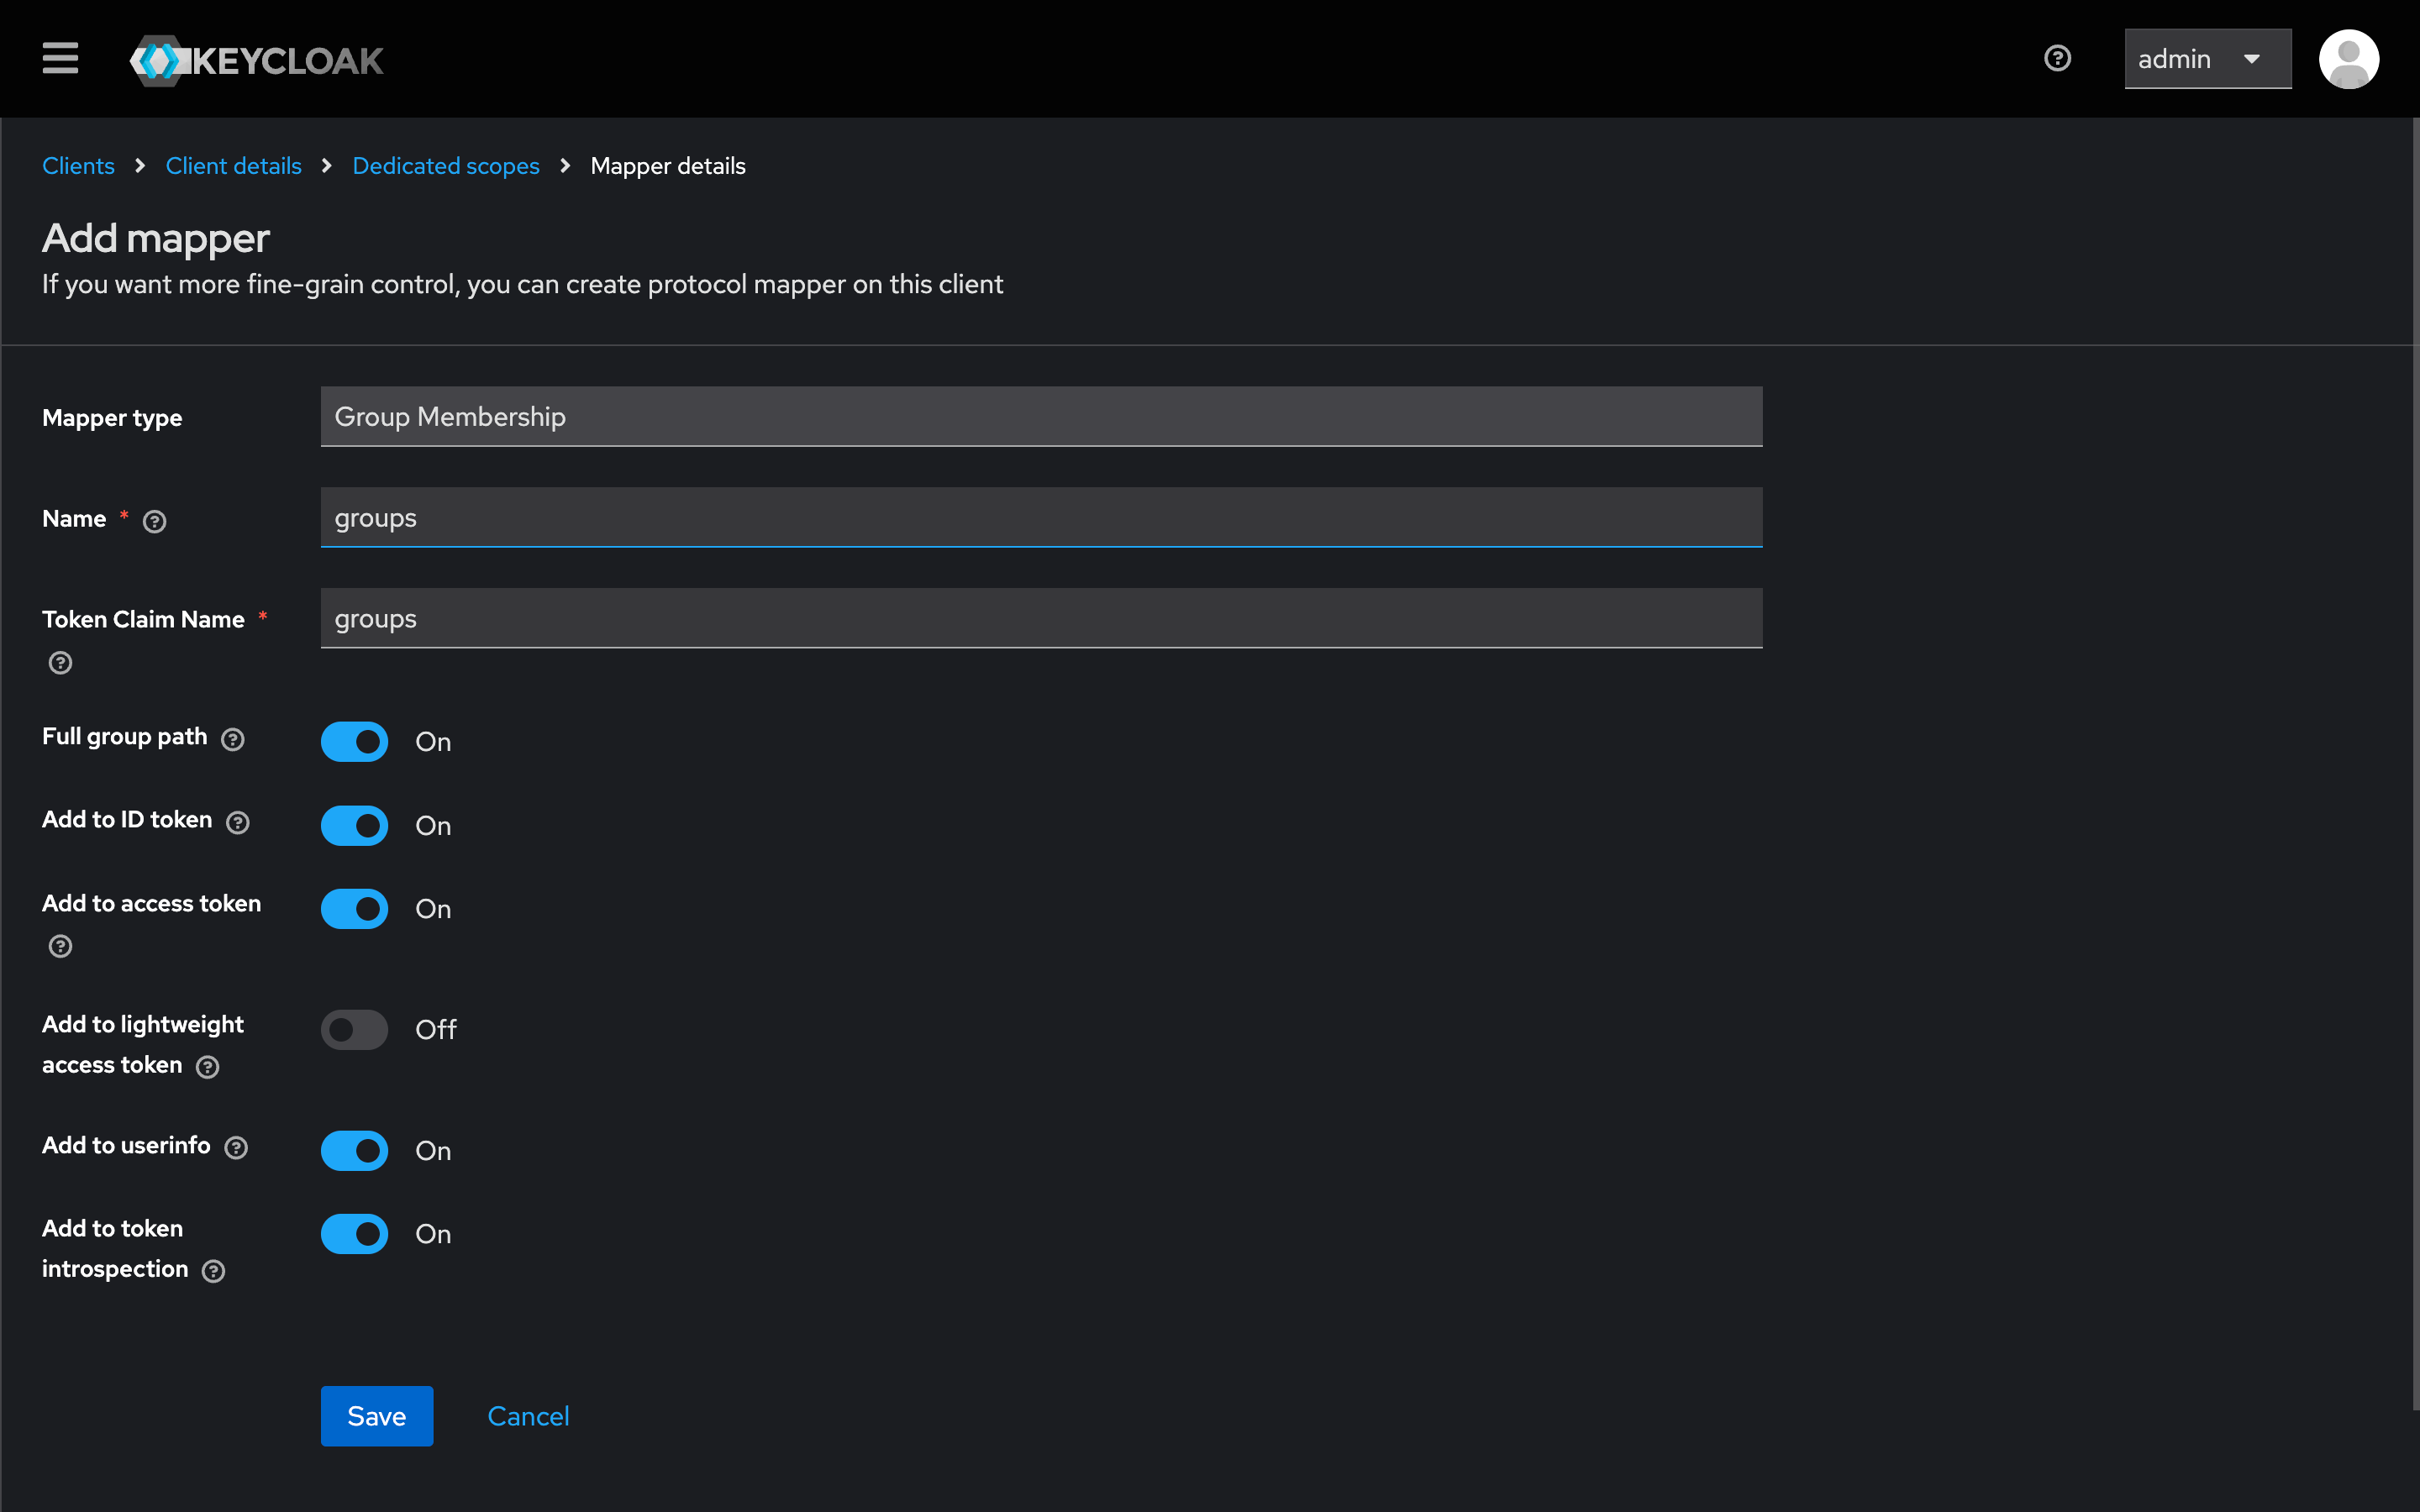
- Click Add mapper → By configuration.
- Select Group Membership.
- Configure:
- Name:
groups - Token Claim Name:
groups
- Name:
- Click Add mapper → From predefined mappers.
- Select client roles.
- Edit the new mapper:
- Client ID:
XplicitTrust - Token Claim Name:
roles - Enable Add to ID token.
- Enable Add to lightweight access token.
- Client ID:

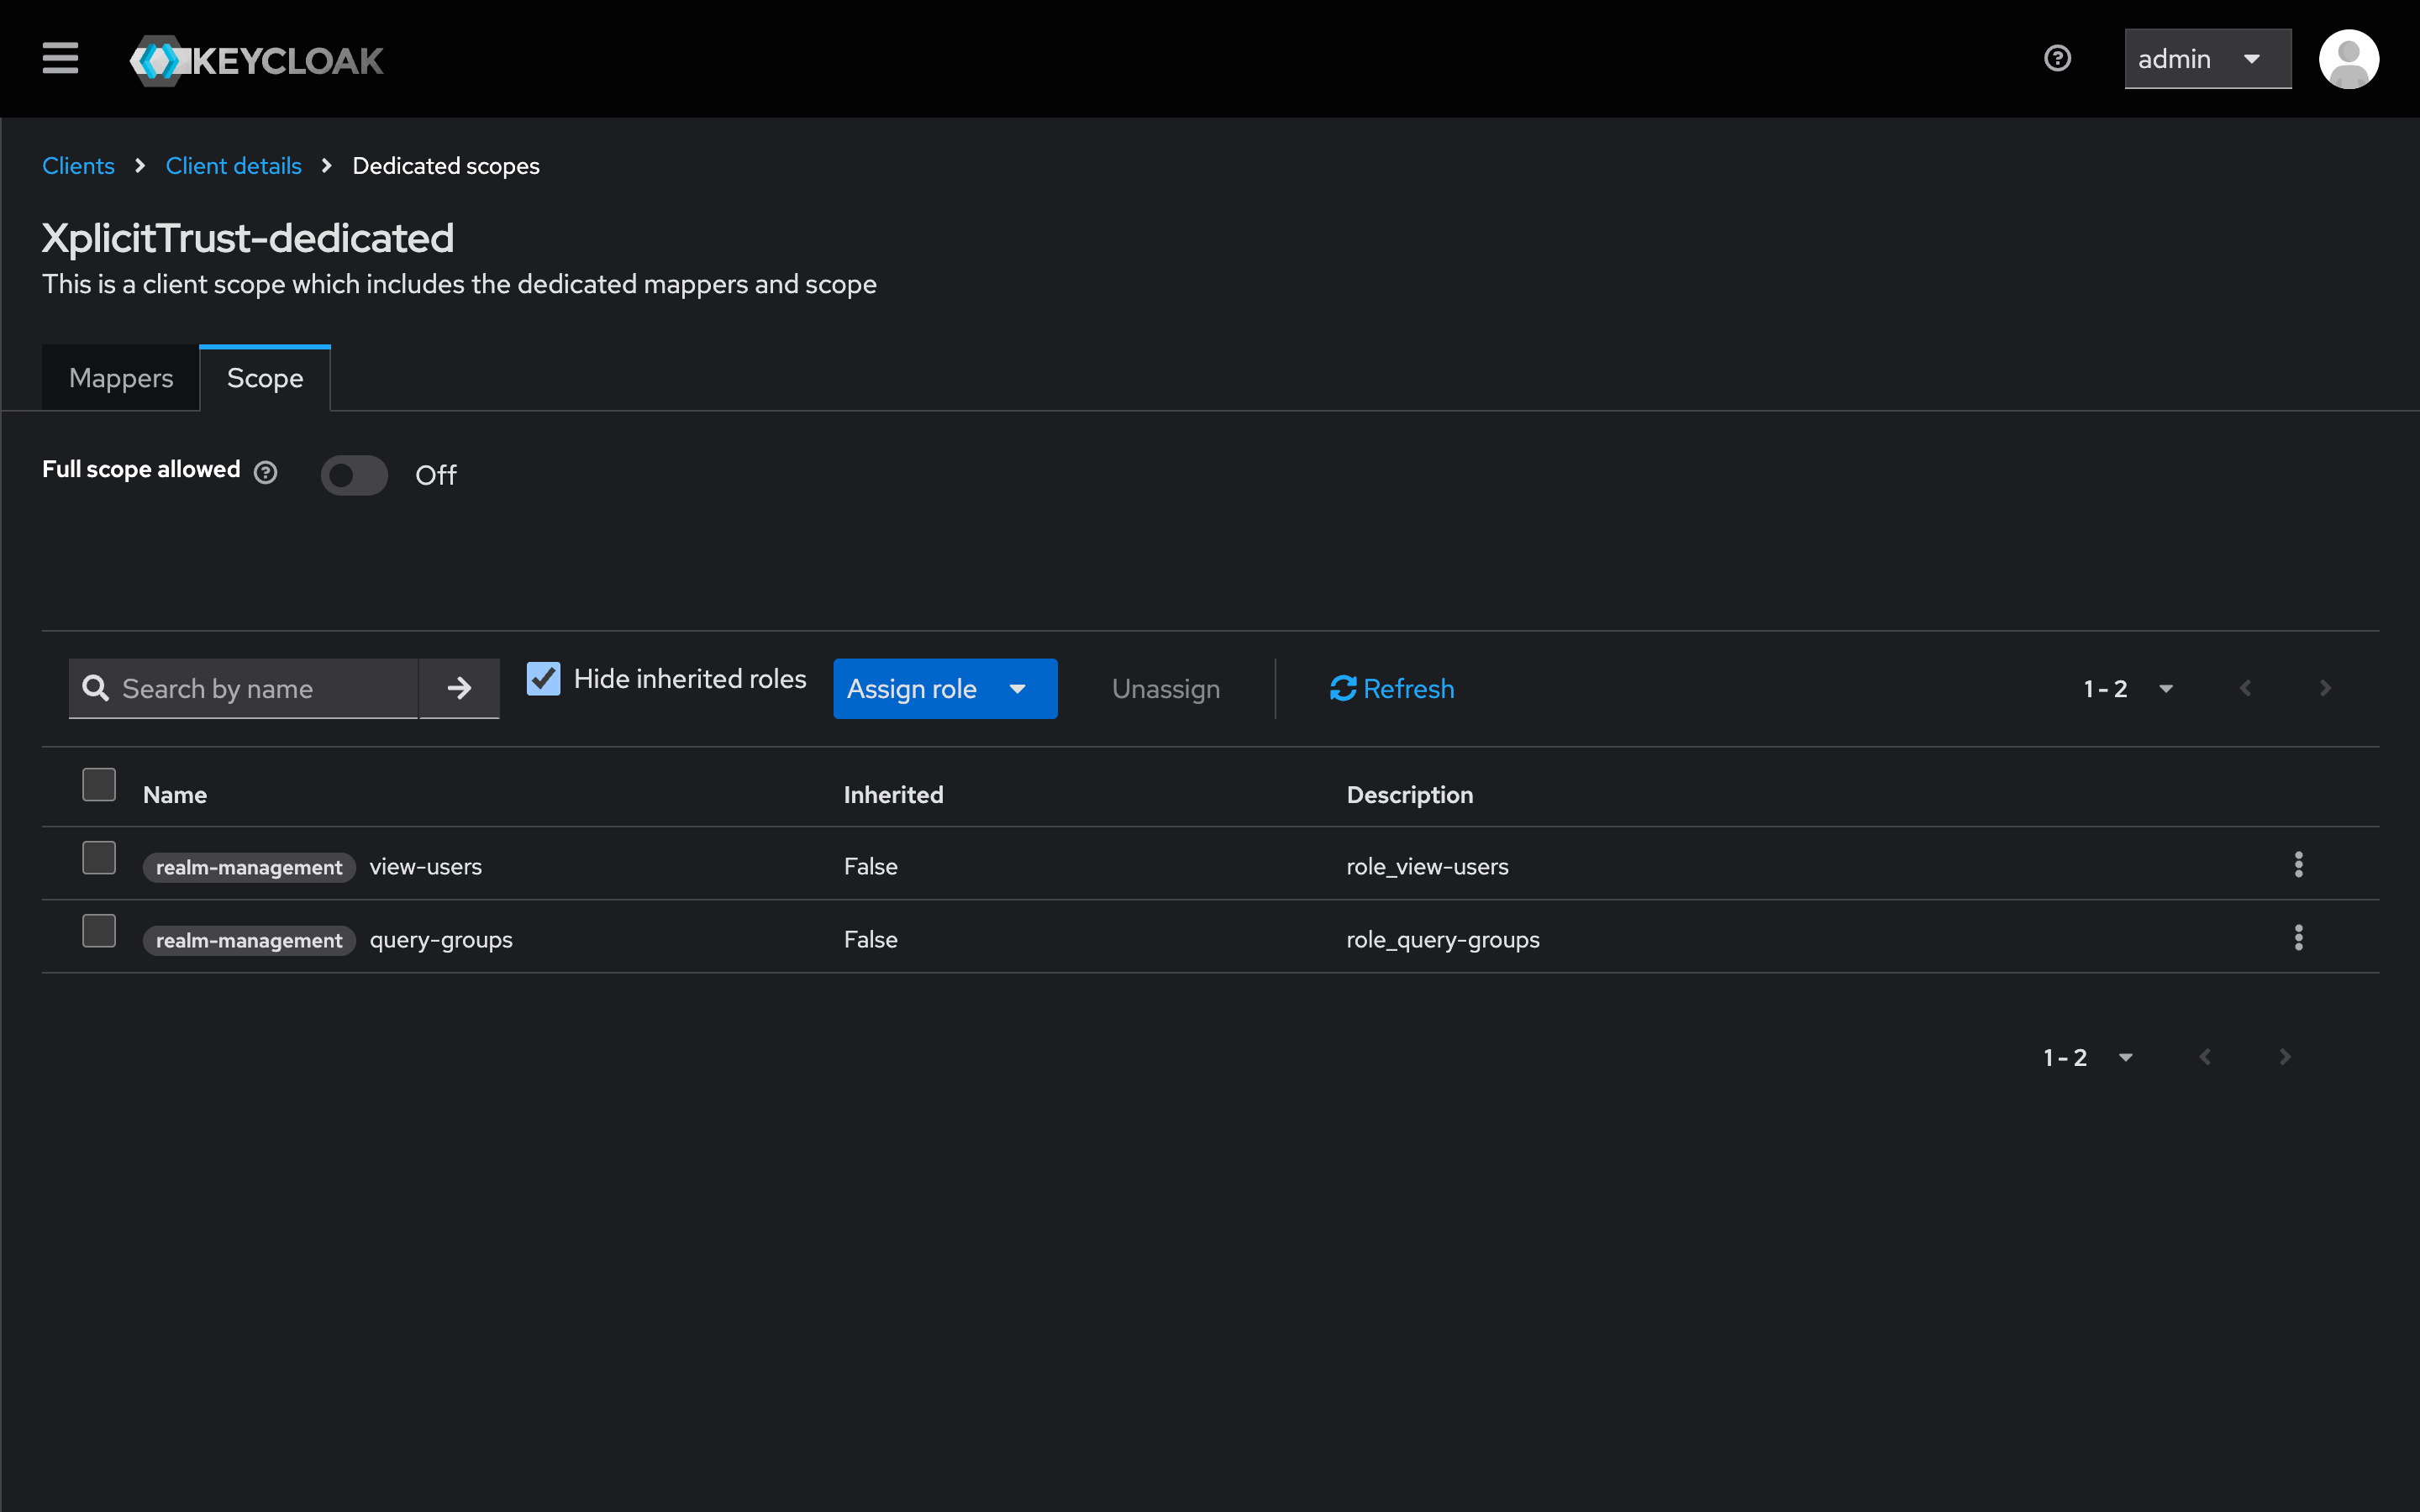
- Switch to the Scope tab.
- Disable Full scope allowed.
- Assign the following roles from
realm-management:query-groupsview-users
Step 4: Groups
- Navigate to the main Groups page in the sidebar.
- Create two groups:
XplicitTrust AdministratorsandXplicitTrust Users. - Edit each group and assign the Client Roles you created earlier (
adminoruser) to the corresponding group. - Add your actual users to these groups now.
Sign Up
Gather Information
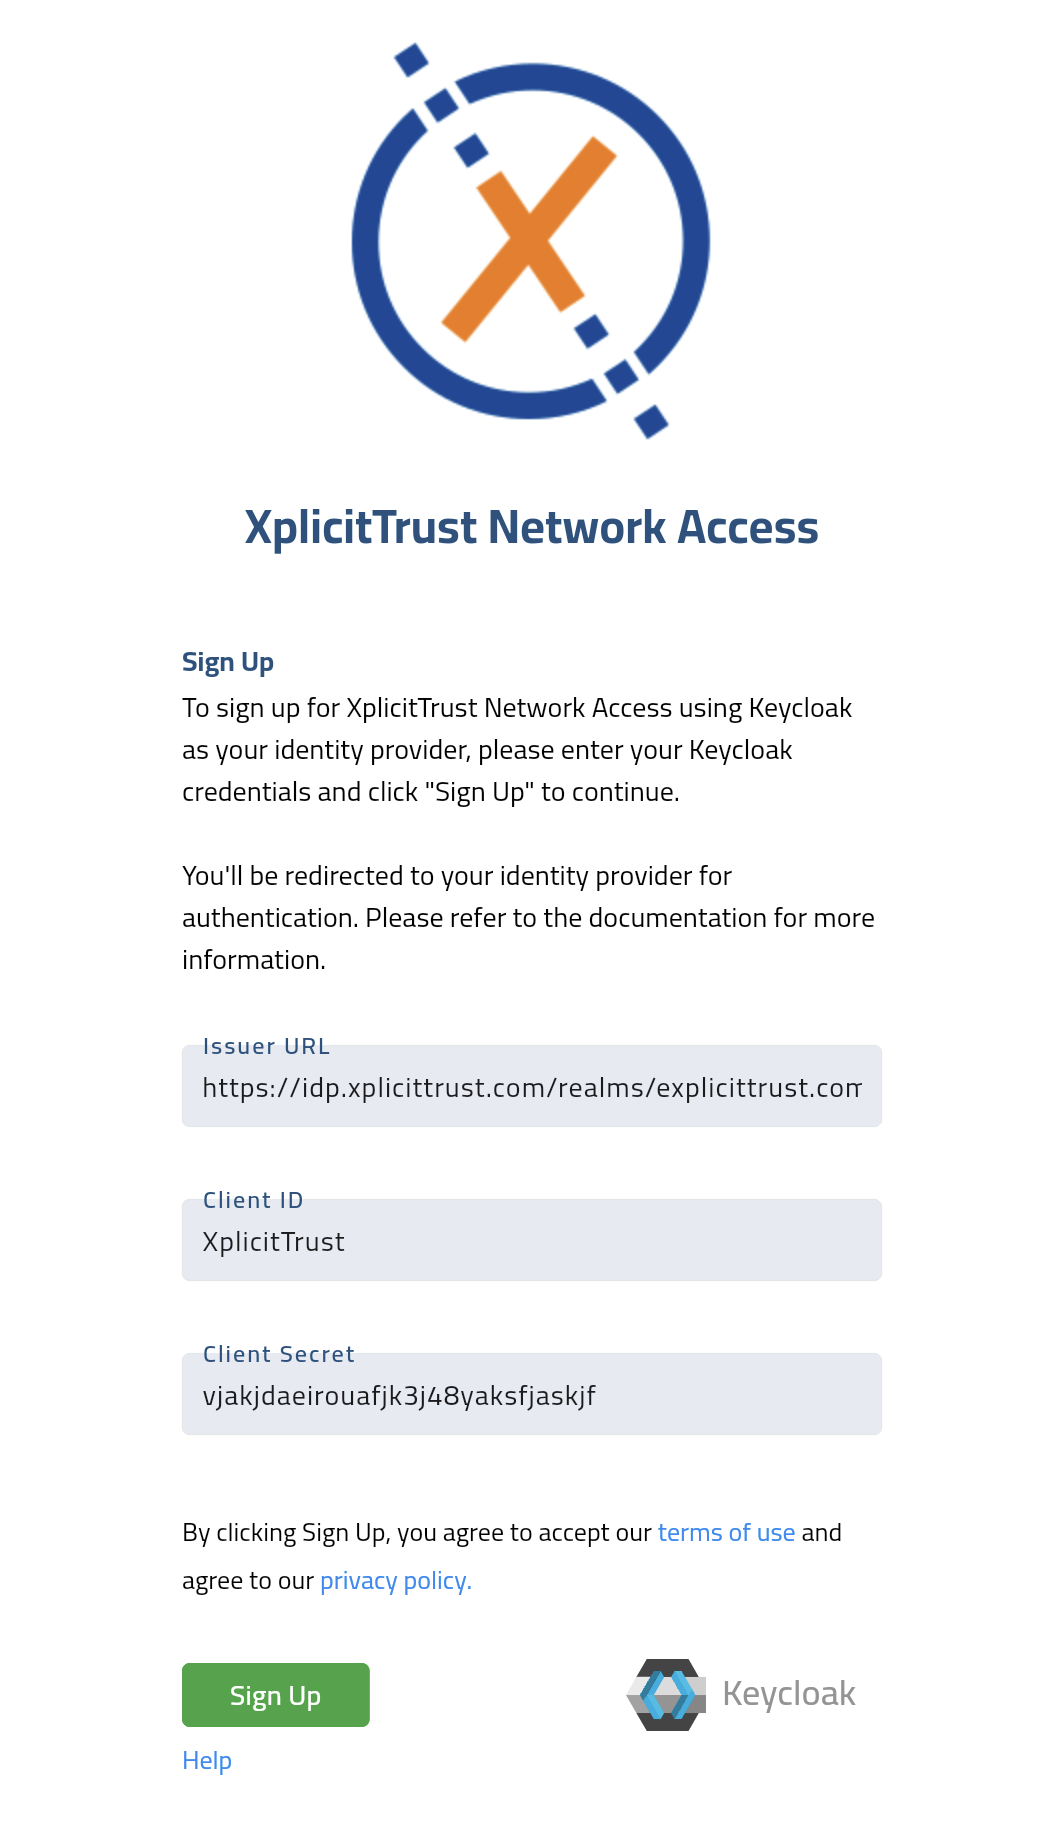
Ensure you have the following three items ready:
1. Client ID (from Step 1)
2. Client Secret (from Step 2)
3. Issuer URL
* To find this: Go to Realm Settings → General. Click the link OpenID Endpoint Configuration. Copy the value inside "issuer": "...".
Connect XplicitTrust
- Visit the signup page: https://console.xplicittrust.com/#/signup/keycloak
-
Enter your credentials.
-
Click Signup and follow the OpenID Connect login process.
- Success! You can now access the portal at https://console.xplicittrust.com/